Easy Milky Way Fudge Recipe- Decadent & Delicious
Milky Way Fudge. Just the name conjures up images of creamy, dreamy indulgence, doesn’t it? If you’ve ever been captivated by the iconic candy bar, prepare yourself for an elevated experience that will transport your taste buds straight to the cosmos. This isn’t just any fudge; this is a celebration of those beloved caramel, nougat, and chocolate layers, all transformed into a rich, decadent confection that’s surprisingly easy to make right in your own kitchen. What is it about Milky Way Fudge that makes it so utterly irresistible? It’s that perfect balance of sweet, chewy, and chocolatey goodness, a nostalgic flavor profile that brings back childhood memories and satisfies our grown-up cravings. What truly sets this Milky Way Fudge apart is its ability to capture the essence of the origin extractal in a melt-in-your-mouth form, offering a delightful texture and an intense chocolatey punch that’s simply out of this world.
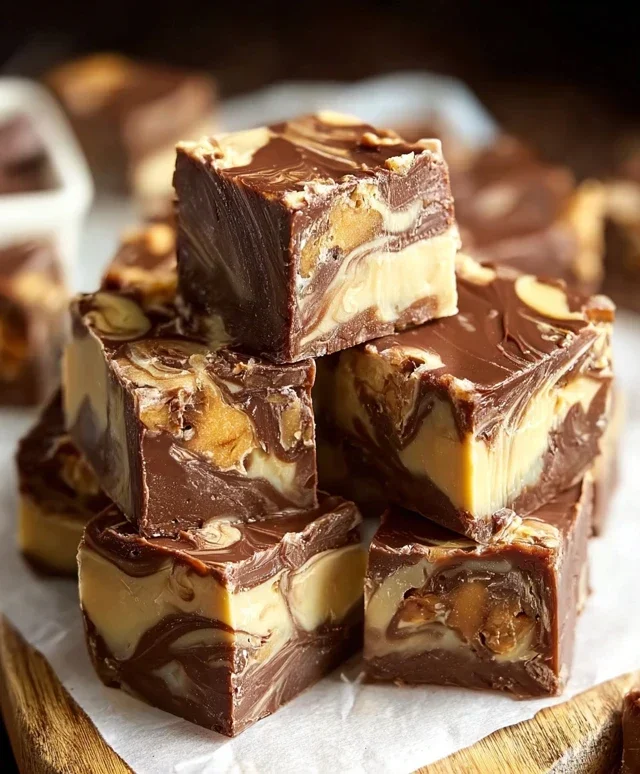
Milky Way Fudge
Get ready to indulge in a slice of celestial sweetness with this incredible Milky Way Fudge! This recipe transforms the beloved candy bar into a rich, decadent, and incredibly easy-to-make fudge. Imagin extracte the perfect balance of chocolatey goodness, chewy caramel, and that signature nougat-like texture, all in one melt-in-your-mouth bite. It’s the kind of treat that’s perfect for sharing (or not!), for holidays, or just when you need a little bit of magic in your day. What I love most about this recipe is how simple it is. You don’t need to be a master chocolatier to achieve stunning results. With just a few basic ingredients and a little bit of stirring, you’ll have a batch of fudge that will have everyone asking for the recipe.
Let’s dive into what you’ll need to create this out-of-this-world fudge.
Ingredients:
Cooking Instructions
Now, let’s get to the fun part – making this amazing Milky Way Fudge! The process is remarkably straightforward, relying on the magic of melting and combining.
Melting the Base
The first step is to create the smooth, luscious chocolate base for our fudge. This is where the semi-sweet chocolate chips, sweetened condensed milk, and butter come together. In a medium, heavy-bottomed saucepan over low heat, combine the 3 cups of semi-sweet chocolate chips, the 14-ounce can of sweetened condensed milk, and the ¼ cup of unsalted butter. It’s really important to use low heat here. If the heat is too high, you risk scorching the condensed milk or seizing the chocolate, which can result in a grainy texture. Stir constantly with a heatproof spatula or wooden spoon. Keep stirring gently and consistently. You’ll notice the butter will start to melt, and then the chocolate chips will begin extract to soften and melt into the condensed milk. Continue to stir until the mixture is completely smooth and glossy. This usually takes about 5-8 minutes, depending on your stovetop. Don’t rush this step; patience will be rewarded with a beautiful, velvety fudge base. Once it’s perfectly smooth, remove the saucepan from the heat.
Adding the Flavor Enhancers
With the chocolate base melted and smooth, it’s time to add the ingredients that will elevate the flavor profile of our fudge. To the warm chocolate mixture, stir in the 1 teaspoon of vanilla extract. Vanilla extract is a wonderful flavor enhancer that complements the chocolate beautifully and adds a subtle depth of flavor that you might not even be able to pinpoint, but you’ll definitely notice its absence if you skip it! Give it a good stir to ensure it’s evenly distributed throughout the molten chocolate. This is also the point where we introduce the star of our show – the chopped Milky Way bars. Take your 4 regular Milky Way bars and chop them into small, bite-sized pieces. The size of your chopped pieces will determine how distinct they are in the final fudge. Smaller pieces will distribute more evenly and create a more cohesive texture, while larger pieces will give you delightful pockets of caramel and nougat. Gently fold these chopped Milky Way pieces into the chocolate mixture. You want to coat them thoroughly in the fudge base without over-mixing, which could start to melt the caramel too much at this stage. The goal is to have chunks of Milky Way suspended within the chocolatey goodness.
Preparing for Setting
Before we pour our delicious concoction into its final resting place, we need to prepare the vessel that will hold it while it sets. Line an 8×8 inch baking pan with parchment paper. It’s crucial to leave some overhang on the sides of the parchment paper; this will act as handles, making it incredibly easy to lift the entire slab of fudge out of the pan once it’s set. Lightly grease the parchment paper as well, or you can use a baking spray. This ensures that even if a tiny bit of the fudge sticks, it will release cleanly.
Pouring and Setting
Carefully pour the Milky Way fudge mixture into the prepared 8×8 inch baking pan. Use your spatula to spread it evenly into all the corners of the pan. Take your time to get a nice, flat surface, as this will make for cleaner cuts later. If you’re feeling extra fancy and decided to use the optional caramel sauce, now is the time to add a drizzle! Warm the caramel sauce slightly (just a few seconds in the microwave) to make it easier to drizzle. Use a fork or spoon to create swirls of caramel over the top of the fudge. This adds another layer of caramel goodness and a beautiful visual appeal. Once you’ve achieved your desired drizzle, gently tap the pan on the counter a few times. This helps to settle the fudge and release any air bubbles that might be trapped.
The Waiting Game
This is perhaps the hardest part – the waiting! Now, you need to let your Milky Way Fudge set. You have two options here: you can let it set at room temperature for about 2-3 hours, or you can speed up the process by placing it in the refrigerator for about 1-2 hours. For the best texture, I often find letting it set at room temperature yields a slightly softer, more fudgy consistency, while refrigeration can make it a bit firmer. Once the fudge is firm to the touch and has set completely, use the parchment paper overhang to lift the entire slab out of the pan. Place it on a cutting board.
Slicing and Serving
Now for the grand finnon-alcoholic ale – slicing your beautiful Milky Way Fudge! Using a sharp knife, cut the fudge into small, bite-sized squares. For cleaner cuts, you can run your knife under hot water and dry it between cuts. This fudge is incredibly rich, so small squares are often the perfect serving size. You can serve it immediately, or store it in an airtight container at room temperature for up to a week, or in the refrigerator for longer. Enjoy this decadent, homemade treat that’s sure to be a crowd-pleaser!
Conclusion:
I hope you’re as excited as I am to dive into this incredibly delicious Milky Way Fudge recipe! What makes this treat so special is its perfect balance of rich chocolate, creamy nougat, and crunchy caramel, all coming together in a wonderfully decadent bite. It’s surprisingly easy to make, making it an ideal project for begin extractners and a guaranteed crowd-pleaser for any occasion. Imagin extracte the delight on your friends’ and family’s faces as they savor this homemade delight. Don’t hesitate to give this Milky Way Fudge a try; you won’t regret the sweet rewards!
When it comes to serving, this fudge is fantastic on its own, of course. But it also makes an impressive addition to a dessert platter, pairs beautifully with a cup of coffee or hot chocolate, and is a perfect homemade gift. For variations, consider adding a sprinkle of sea salt on top before it sets for a sweet and salty contrast, or even incorporating some chopped peanuts for an extra layer of texture and flavor. Get creative and make this recipe your own!
Frequently Asked Questions:
Can I make this Milky Way Fudge without marshmallows?
While marshmallows are key to achieving that signature chewy nougat texture in this specific recipe, you could experiment with other chewy candies like melted caramels or a nougat candy bar, though the final texture might differ slightly. For the classic Milky Way Fudge experience, marshmallows are highly recommended.
How long does this fudge last?
Properly stored in an airtight container at room temperature, this delicious fudge can last for up to 10-14 days. If you live in a very warm climate, refrigerating it might be a good idea to prevent it from getting too soft, although the texture might become a little firmer.
Can I use a different type of chocolate?
Absolutely! While the recipe calls for semi-sweet chocolate, feel free to experiment. Milk chocolate will yield a sweeter, creamier fudge, while dark chocolate will offer a more intense cocoa flavor. You can even try a mix of different chocolates for a unique taste profile.
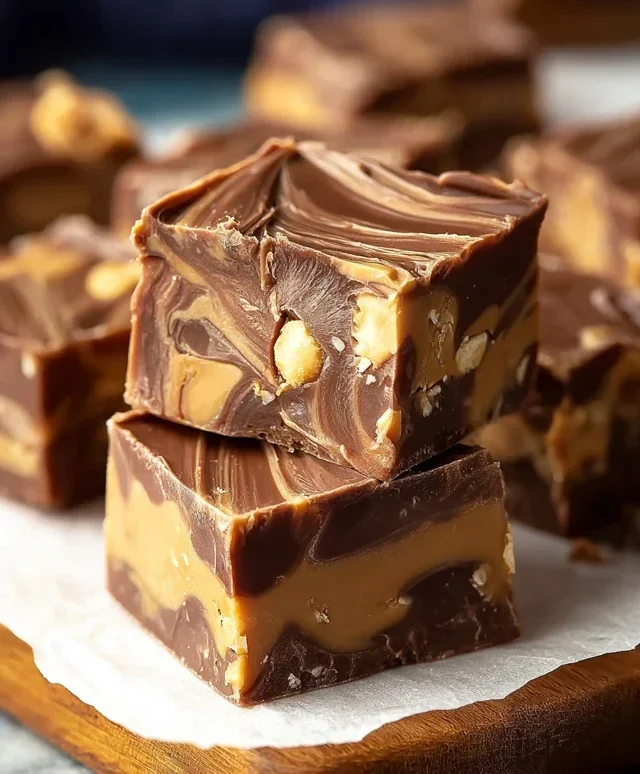
Milky Way Fudge
Rich and decadent fudge loaded with chopped Milky Way bars, perfect for chocolate and caramel lovers.
Ingredients
-
3 cups (18 oz) semi-sweet chocolate chips
-
1 (14 oz) can sweetened condensed milk
-
1/4 cup unsalted butter
-
1 tsp vanilla extract
-
4 regular Milky Way bars, chopped
-
1/4 cup caramel sauce (optional, for drizzling)
Instructions
-
Step 1
Line an 8×8 inch baking pan with parchment paper, leaving an overhang on the sides. -
Step 2
In a large microwave-safe bowl, combine semi-sweet chocolate chips, sweetened condensed milk, and unsalted butter. -
Step 3
Microwave on high for 1 minute. Stir well. Continue microwaving in 30-second intervals, stirring after each, until smooth and fully melted. -
Step 4
Stir in the vanilla extract until combined. -
Step 5
Gently fold in the chopped Milky Way bars. -
Step 6
Pour the fudge mixture into the prepared baking pan and spread evenly. -
Step 7
If using, drizzle the caramel sauce over the top and swirl gently with a toothpick. -
Step 8
Chill in the refrigerator for at least 2 hours, or until firm. -
Step 9
Once firm, lift the fudge out of the pan using the parchment paper overhang. Cut into squares.
Important Information
Nutrition Facts (Per Serving)
It is important to consider this information as approximate and not to use it as definitive health advice.
Allergy Information
Please check ingredients for potential allergens and consult a health professional if in doubt.