Brown Butter Brookies- Decadent Chocolate Chip Cookie Brownie
Brown butter brookies are about to become your new obsession. There’s something undeniably magical about the moment you experience that perfect bite – the rich, chewy chocolate chip cookie base giving way to a fudgy brownie topping, all infused with the nutty, caramelized depth of brown butter. It’s the ultimate mashup, a dessert that promises the best of both worlds and consistently delivers. Forget having to choose between your favorite sweet treats; with brown butter brookies, you get them both, elevated to an entirely new level. We’re talking about a flavor profile so complex and satisfying, it’s no wonder these disappear faster than you can say “decadence.” The secret, as you might have guessed, lies in the brown butter, transforming ordinary ingredients into something truly extraordinary.
Get ready to bake the best Brown Butter Brookies you’ve ever tasted.
Here’s why these are a game-changer.
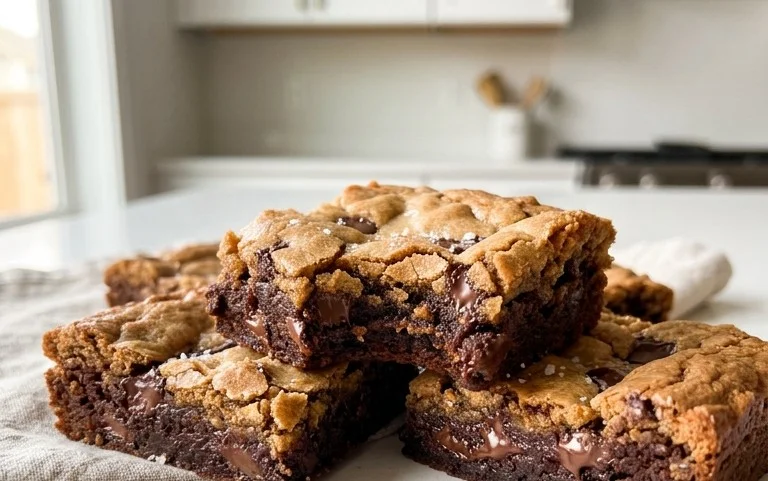
Brown Butter Brookies
Get ready to experience a dessert revelation! We’re talking about brookies – the glorious hybrid that marries the rich, fudgy goodness of brownies with the sweet, chewy perfection of chocolate chip cookies. But we’re not just stopping there. These brookies are elevated with the magic of brown butter, infusing every bite with a deep, nutty, and utterly irresistible caramel-like flavor. If you’re a fan of both brownies and cookies, prepare for your taste buds to do a happy dance. This recipe is designed to be decadent, relatively straightforward, and incredibly rewarding. Let’s dive into what you’ll need and how to bring these beauties to life.
Ingredients:
Instructions:
This recipe is broken down into two main components: the brownie batter and the cookie dough. We’ll prepare them separately and then swirl them together for that signature brookie look and taste.
Part 1: Crafting the Rich Brownie Layer
1. Brown the Butter for the Brownie Layer: In a light-colored saucepan over medium heat, melt 3/4 cup of cubed salted butter. Continue to cook, swirling the pan occasionally, as the butter melts and begin extracts to foam. You’ll notice milk solids at the bottom starting to turn golden brown. This process should take about 5-8 minutes. Watch it closely; you want it to turn a lovely amber color, smelling nutty and caramelized, but not burnt. Once it reaches this stage, immediately remove it from the heat and pour it into a heatproof bowl to stop the cooking. Let it cool slightly.
2. Combine Wet Ingredients for Brownie Batter: To the slightly cooled brown butter, add 1/4 cup of vegetable oil, 3/4 cup of cocoa powder, and 3/4 cup of granulated sugar. Whisk these ingredients together until they are well combined and smooth. This creates the base for our intensely chocolatey brownie layer. Next, incorporate the 3 large eggs, one at a time, whisking well after each addition. Finally, stir in 1 and 1/2 teaspoons of vanilla extract until everything is homogenous.
3. Incorporate Dry Ingredients for Brownie Batter: In a separate medium bowl, whisk together 3 cups of all-purpose flour, 1 teaspoon of baking soda, 1 teaspoon of baking powder, and 1/2 teaspoon of salt. This step ensures your leavening agents and salt are evenly distributed, preventing dense spots or uneven baking. Gradually add these dry ingredients to the wet brownie mixture, mixing with a spatula or wooden spoon until just combined. Be careful not to overmix; a few streaks of flour are perfectly acceptable. The batter will be thick and fudgy.
Part 2: Building the Perfect Cookie Dough
1. Cream Butter and Sugars for Cookie Dough: In a large mixing bowl, cream together the remaining 14.5 tablespoons of salted butter (which should be softened but not melted) with 3/4 cup of dark brown sugar and 3/4 cup of granulated sugar. You can use an electric mixer for this, beating on medium speed until the mixture is light and fluffy, about 2-3 minutes. This creaming process incorporates air, which is crucial for the cookie dough’s texture.
2. Add Eggs and Vanilla to Cookie Dough: Beat in the 2 large eggs, one at a time, ensuring each is fully incorporated before adding the next. Then, stir in 1 and 1/2 teaspoons of vanilla extract. Scrape down the sides of the bowl as needed to make sure everything is evenly mixed.
3. Combine Dry Ingredients for Cookie Dough: In a separate bowl, whisk together 3 cups of all-purpose flour (this is a separate portion from the brownie flour), 1 teaspoon of baking soda, 1 teaspoon of baking powder, and 1/2 teaspoon of salt. Gradually add this dry mixture to the creamed butter and sugar mixture, mixing on low speed or by hand with a spatula until just combined. Again, avoid overmixing.
4. Fold in Chocolate Chips: Gently fold in 1 and 1/2 cups of chocolate chips into the cookie dough until they are evenly distributed. You can use a mix of dark, milk, or semi-sweet chocolate chips, or whatever your heart desires!
Part 3: Assembling and Baking Your Brookies
1. Prepare Your Pan and Layer the Batters: Preheat your oven to 350°F (175°C). Grease and flour a 9×13 inch baking pan, or line it with parchment paper, leaving an overhang on the sides for easy removal. Dollop spoonfuls of the brownie batter and cookie dough randomly over the bottom of the prepared pan. Don’t worry about perfection; the swirling is part of the charm!
2. Create the Swirls: Using a knife or a skewer, gently swirl the two batters together. You want to create marbled patterns, not completely blend them. Drag the knife through the batters in figure-eight motions or random sweeps. Be mindful not to over-swirl, as you want distinct layers and pockets of brownie and cookie.
3. Bake to Golden Perfection: Bake for 30-35 minutes, or until the edges are set and a toothpick inserted into the center comes out with moist crum extractbs attached, but not wet batter. The baking time will vary slightly depending on your oven. You want the brookies to be slightly fudgy in the center, not completely dry.
4. Cool and Slice: Let the brookies cool completely in the pan on a wire rack. This is crucial for them to set properly. Once cooled, use the parchment paper overhang to lift the entire slab out of the pan. Cut into squares or rectangles.
Enjoy these incredible brown butter brookies! They are best served at room temperature and are perfect for sharing (or not!).
Conclusion:
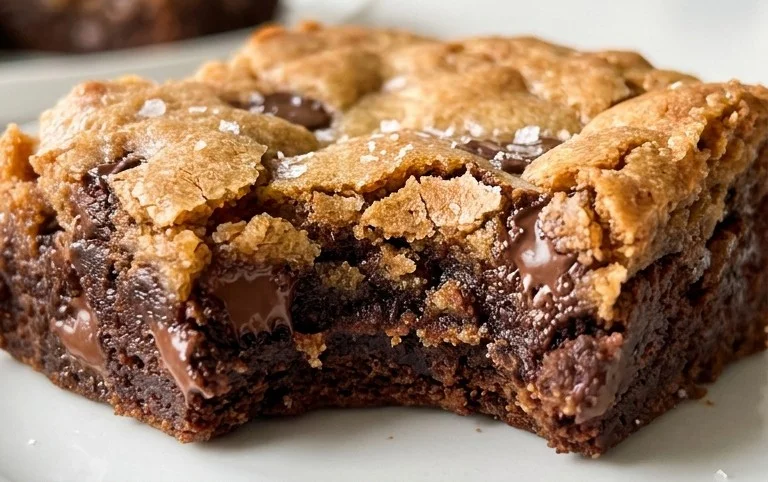
I truly hope you’ve enjoyed learning how to make these incredibly decadent Brown Butter Brookies! This recipe is a showstopper because it perfectly marries the chewy, rich goodness of a brownie with the crisp, buttery edges of a blondie. The magic of brown butter elevates both layers, infusing them with a nutty, toffee-like depth that is simply irresistible. Whether you’re a seasoned baker or just starting out, these brookies are surprisingly straightforward to assemble and yield spectacular results every time. They are the ultimate crowd-pleaser and a guaranteed way to impress your friends and family.
For serving, I love these brookies warm, straight from the oven, perhaps with a scoop of vanilla bean ice cream melting into the fudgy brownie layer. They are also fantastic at room temperature, making them ideal for potlucks or as an afternoon treat with a cup of coffee or tea. If you’re feeling adventurous, consider adding a sprinkle of flaky sea salt on top before baking to enhance the sweetness, or swirl in some raspberry jam for a fruity twist. Don’t be afraid to experiment! I wholeheartedly encourage you to give these brown butter brookies a try – I promise you won’t be disappointed by this delightful fusion of two beloved desserts.
Frequently Asked Questions:
Can I make the brownie and blondie layers separately?
Absolutely! While the beauty of brookies is their marbled fusion, you can certainly bake each layer independently in their respective pans if you prefer. This might be helpful if you want to ensure perfect texture for each component, though you’ll miss out on some of the delightful swirling that happens when baked together.
How long will these brown butter brookies last?
Stored in an airtight container at room temperature, these brookies will stay fresh and delicious for about 3-4 days. For longer storage, you can refrigerate them for up to a week. They also freeze remarkably well, so feel free to bake a big batch and freeze portions for a future craving.
Brown Butter Brookies
A decadent fusion of chewy brownies and rich chocolate chip cookies, elevated with the nutty depth of brown butter.
Ingredients
-
14.5 tbsp salted butter (206 grams), divided
-
3/4 cup dark brown sugar, packed (163 grams)
-
3/4 cup granulated sugar (156 grams)
-
2 large eggs, at room temperature
-
1 and 1/2 tsp vanilla extract
-
3 cups all-purpose flour, spooned & leveled (390 grams)
-
1 tsp baking soda
-
1 tsp baking powder
-
1/2 tsp salt
-
1 and 1/2 cups chocolate chips (270 grams)
-
3/4 cup salted butter, cubed (170 grams before browning, 140 grams after)
-
4 ounces semi-sweet chocolate, chopped (113 grams)
-
1/4 cup vegetable oil (55 grams)
-
3/4 cup cocoa powder (63 grams)
-
3 large eggs, at room temperature
Instructions
-
Step 1
For the cookie layer: Melt 14.5 tbsp salted butter in a saucepan over medium heat. Continue cooking, swirling occasionally, until the butter turns a rich amber color and smells nutty. Immediately pour into a heatproof bowl and let cool slightly. This is your brown butter. -
Step 2
In a large bowl, whisk together the cooled brown butter, dark brown sugar, and granulated sugar until well combined. Beat in 2 large eggs one at a time, followed by 1 and 1/2 tsp vanilla extract. -
Step 3
In a separate bowl, whisk together the all-purpose flour, baking soda, baking powder, and 1/2 tsp salt. Gradually add the dry ingredients to the wet ingredients, mixing until just combined. Stir in 1 and 1/2 cups chocolate chips. -
Step 4
For the brownie layer: Melt 3/4 cup cubed salted butter in a saucepan over medium heat. Cook, swirling, until it turns a rich amber color and smells nutty. Remove from heat. Stir in the chopped semi-sweet chocolate until melted. Whisk in the vegetable oil and cocoa powder until smooth. Add 3 large eggs one at a time, whisking well after each addition. Stir in 1 and 1/2 tsp vanilla extract. -
Step 5
Preheat oven to 350°F (175°C). Grease and flour a 9×13 inch baking pan or line with parchment paper, leaving an overhang. Spread the brownie batter evenly into the prepared pan. -
Step 6
Drop spoonfuls of the cookie dough over the brownie batter. Use a spatula or the back of a spoon to gently spread the cookie dough to cover the brownie batter as much as possible. Don’t worry if there are some gaps. -
Step 7
Bake for 20-25 minutes, or until the edges of the brookies are set and a toothpick inserted into the center comes out with moist crumbs attached (not wet batter). -
Step 8
Let cool completely in the pan on a wire rack before cutting into squares.
Important Information
Nutrition Facts (Per Serving)
It is important to consider this information as approximate and not to use it as definitive health advice.
Allergy Information
Please check ingredients for potential allergens and consult a health professional if in doubt.