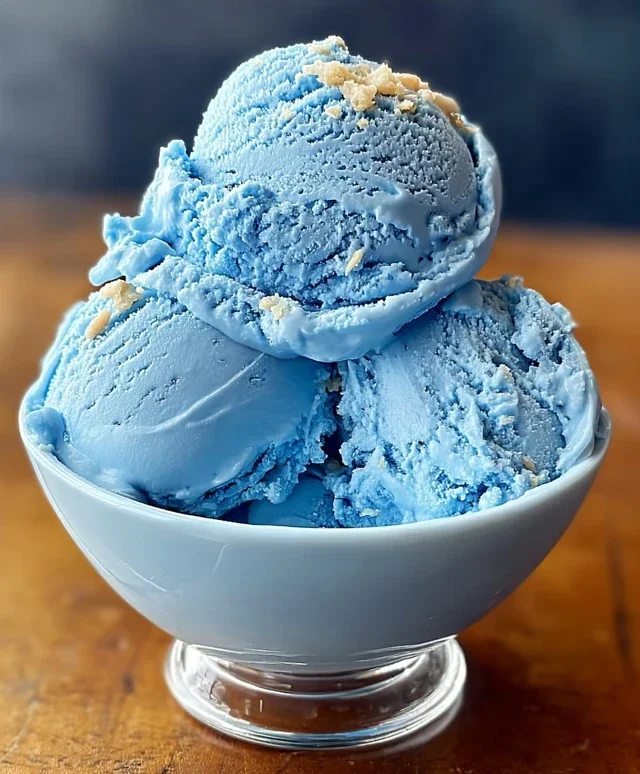
Blue Moon Ice Cream-Taste the Cosmic Swirl
Blue Moon Ice Cream is a vibrant enigma, a nostalgic whisper from childhood summers and county fairs. Have you ever wondered about that striking, almost otherworldly azure hue? It’s not just a pretty face; this beloved flavor holds a special place in the hearts of many for its uniquely refreshing, slightly fruity, and subtly almond-like taste. Unlike your everyday vanilla or chocolate, Blue Moon Ice Cream offers an experience that’s both familiar and delightfully unexpected. It’s the kind of dessert that sparks joy and conversation, a conversation starter that’s as colorful as the ice cream itself. We’re diving deep into the magic behind this iconic treat, exploring its origin extracts and, of course, sharing a sensational recipe so you can recreate that delightful Blue Moon Ice Cream experience right in your own kitchen. Get ready to scoop up some serious happiness!
Blue Moon Ice Cream
There’s something truly magical about Blue Moon ice cream. Its vibrant, almost otherworldly color hints at a flavor that’s equally captivating. Unlike many novelty ice cream flavors, Blue Moon isn’t aiming for a specific fruit or candy; instead, it offers a delightful, slightly mysterious blend of sweet, nutty, and vanilla notes that keep you coming back for another scoop. It’s the perfect treat for a hot summer day, a fun addition to a party, or simply a way to brighten your evening. Making it at home is surprisingly straightforward, and the satisfaction of creating this unique dessert from scratch is immense. Get ready to impress your friends and family with this delightful homemade Blue Moon ice cream!
Ingredients:
Making the Ice Cream Base
The first step in creating our enchanting Blue Moon ice cream is to prepare the base. This involves bringin extractg together the primary liquid components and ensuring the sugar is fully dissolved, which is crucial for a smooth, creamy texture and preventing ice crystals from forming.
1. In a medium-sized bowl, combine the heavy cream and whole milk. Whisk these together gently until they are well incorporated. This mixture forms the rich, creamy foundation of our ice cream. Using whole milk contributes to a richer mouthfeel than skim or 2%, and heavy cream provides that luxurious, velvety texture we all associate with good ice cream.
2. Add the granulated sugar to the cream and milk mixture. Now, this is where a little patience comes in. You want to whisk this thoroughly until the sugar is completely dissolved. You can do this by hand with a whisk, or if you prefer, you can gently heat the mixture over low heat in a saucepan, stirring constantly, until the sugar disappears. Be very careful not to boil the mixture if you choose to heat it; just warm it enough to help the sugar dissolve easily. Once the sugar is dissolved, remove it from the heat (if you heated it) and let it cool down to room temperature. This cooling step is important; you don’t want to add warm liquid to your ice cream maker, as it can affect the churning process.
3. Once the base is at room temperature, it’s time to add our flavorings. Stir in the vanilla extract and the almond extract. The vanilla extract provides a classic, comforting sweetness, while the almond extract adds a subtle, sophisticated nutty note that is characteristic of Blue Moon ice cream. These two extracts work in harmony to create that unique and delightful flavor profile. Taste the mixture at this point. If you like a stronger almond flavor, you can add a tiny bit more almond extract, but be cautious, as it can be quite potent.
Achieving the Signature Blue Hue
Now for the fun part – turning our creamy base into the visually stunning Blue Moon ice cream we all know and love! The color is what truly sets this ice cream apart and makes it feel so special.
4. It’s time to add the blue food coloring. Start by adding just a drop or two of blue food coloring to your base mixture. Stir it in thoroughly, observing the color change. You’re aiming for a beautiful, vibrant sky-blue color. Add more food coloring, a drop at a time, until you achieve the desired shade. Remember that the color will lighten slightly once the ice cream is churned and frozen, so you might want to err on the side of a slightly more intense blue in the liquid base. I like to use gel food coloring for a more concentrated color without adding extra liquid to the base.
5. If you’re choosing to add maraschino cherries for a touch of texture and a hint of fruity sweetness, stir them in now. Chop them finely so they are distributed evenly throughout the ice cream. They add a delightful surprise with every bite and complement the creamy, sweet, and slightly nutty flavors beautifully. Some people prefer their Blue Moon ice cream without the cherries, and that’s perfectly fine too! This recipe is flexible to your preferences.
Churning and Freezing the Ice Cream
With our beautifully colored and flavored base ready, we’re now ready to churn and freeze it into glorious ice cream. The churning process incorporates air and prevents large ice crystals from forming, resulting in that smooth, creamy texture.
6. Pour the chilled Blue Moon ice cream base into your ice cream maker, following the manufacturer’s instructions for your specific machine. This typically involves churning for about 20-30 minutes, or until the mixture has thickened to a soft-serve consistency. During this process, the machine constantly churns the base while it freezes, incorporating air and creating a smooth texture. It’s fascinating to watch the liquid transform into a luscious, scoopable dessert right before your eyes!
7. Once the ice cream has reached a soft-serve consistency, transfer it to an airtight container. If you’ve added the chopped maraschino cherries, give the ice cream a final gentle stir to distribute them evenly before sealing the container. For the best texture and to allow the flavors to meld further, press a piece of parchment paper or plastic wrap directly onto the surface of the ice cream before putting on the lid. This helps prevent ice crystals from forming on top.
8. Place the container in your freezer and let it freeze for at least 4-6 hours, or until it is firm enough to scoop. The longer it freezes, the firmer it will become. Before serving, you might want to let it sit at room temperature for a few minutes to soften slightly, making it easier to scoop into perfect balls. Enjoy your homemade Blue Moon ice cream! It’s a truly unique and satisfying treat that’s sure to become a favorite.

Conclusion:
And there you have it – your very own batch of delightful Blue Moon ice cream! This recipe is truly fantastic because it delivers a unique flavor profile that’s both nostalgic and exciting, with that signature almond and hint of citrus that makes Blue Moon so beloved. The vibrant blue hue is also incredibly fun and eye-catching, making it a guaranteed hit at any gathering. Whether you’re a seasoned ice cream maker or a begin extractner, you’ll find this recipe surprisingly straightforward to follow, leading to a creamy, dreamy dessert that rivals any store-bought variety. I truly encourage you to give this Blue Moon ice cream a try; you won’t be disappointed!
For serving suggestions, this ice cream is wonderful on its own, allowing its distinct flavor to shine. However, it also pairs beautifully with a simple sugar cone or a waffle cone for added crunch. For a more elaborate dessert, consider serving it alongside warm brownies or a slice of pound cake. If you’re feeling adventurous, why not try some variations? You could swirl in some blueberry puree for an extra fruity punch, or add a sprinkle of toasted slivered almonds for added texture. The possibilities are as endless as your imagin extractation!
Frequently Asked Questions about Blue Moon Ice Cream:
Q: What makes Blue Moon ice cream blue?
A: The distinctive blue color typically comes from food coloring. While some commercial versions might use specific artificial colorings, in this homemade recipe, we rely on a few drops of blue food coloring to achieve that iconic look. The flavor itself is generally a blend of almond extract and a hint of citrus, not derived from any blue ingredients.
Q: Can I make this Blue Moon ice cream without an ice cream maker?
A: Absolutely! You can achieve a delicious result using the no-churn method. After preparing the base, pour it into a freezer-safe container. Every 30-45 minutes for the first 2-3 hours, stir vigorously with a fork or whisk to break up ice crystals. This manual churning process will create a wonderfully creamy texture, though it might not be quite as smooth as using a machine.
Blue Moon Ice Cream
A vibrant and creamy ice cream with a unique almond-vanilla flavor, inspired by the classic Blue Moon ice cream found at some ice cream parlors.
Ingredients
-
2 cups heavy cream
-
1 cup whole milk
-
3/4 cup granulated sugar
-
1 teaspoon vanilla extract
-
1 teaspoon almond extract
-
Blue food coloring, as needed
-
1/4 cup maraschino cherries, chopped (optional)
Instructions
-
Step 1
In a medium bowl, whisk together the heavy cream, whole milk, granulated sugar, vanilla extract, and almond extract until the sugar is dissolved. -
Step 2
Add blue food coloring, a few drops at a time, stirring until you achieve your desired vibrant blue hue. Remember that the color will lighten slightly when frozen. -
Step 3
If using, stir in the chopped maraschino cherries. -
Step 4
Pour the mixture into your ice cream maker and churn according to the manufacturer’s instructions. -
Step 5
Once churned, transfer the ice cream to an airtight container and freeze for at least 4 hours, or until firm.
Important Information
Nutrition Facts (Per Serving)
It is important to consider this information as approximate and not to use it as definitive health advice.
Allergy Information
Please check ingredients for potential allergens and consult a health professional if in doubt.