No-Bake Patriotic Cheesecake – Easy Red White Blue Dessert
No Bake Patriotic Cheesecake is the ultimate treat for celebrating any star-spangled occasion! Imagin extracte a creamy, dreamy dessert that requires absolutely no oven time, making it perfect for those warm summer gatherings or any time you want a show-stopping dessert without the fuss. This No Bake Patriotic Cheesecake isn’t just beautiful; it’s ridiculously delicious, boasting layers of rich, tangy cheesecake filling swirled with vibrant red and blue fruit compotes, all nestled on a sweet, crunchy grabeef ham cracker crust. It’s the kind of dessert that elicits gasps of delight and immediate requests for seconds. What makes this No Bake Patriotic Cheesecake truly special is its simplicity and its ability to capture the spirit of freedom and festivity in every single bite. Get ready to impress your friends and family with this easy, elegant, and utterly unforgettable dessert!
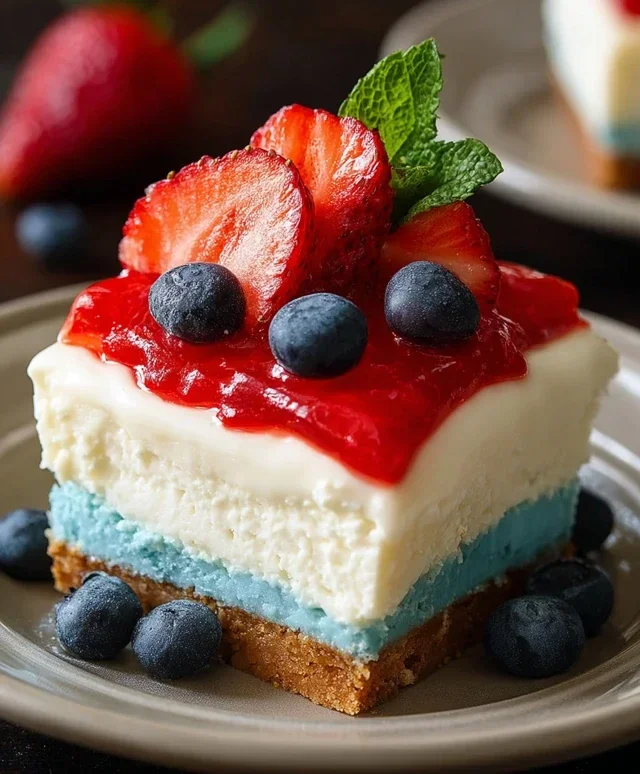
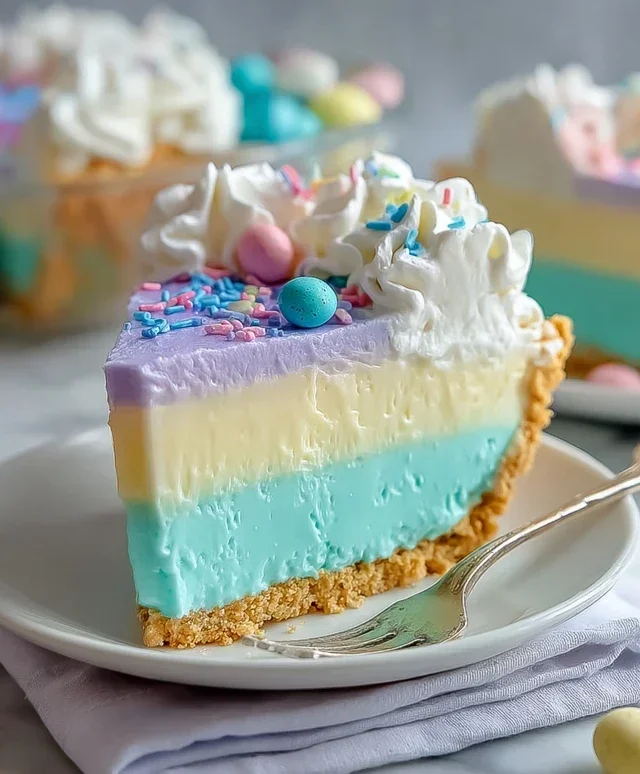
No Bake Patriotic Cheesecake
Get ready to celebrate with a dessert that’s as visually stunning as it is delicious! This No Bake Patriotic Cheesecake is the perfect centerpiece for any summer gathering, from Memorial Day picnics to Fourth of July fireworks. It’s incredibly easy to make, requiring no oven time, and the vibrant layers of red, white, and blue are sure to impress. The creamy cheesecake filling is complemented by a buttery golden Oreo crust and a refreshing Jell-O layer. Let’s dive into making this crowd-pleasing treat!
Ingredients:
Instructions:
Step 1: Prepare the Golden Oreo Crust
Begin extract by creating the foundation of our cheesecake. In a medium bowl, combine the 2 cups of golden Oreo crum extractbs with the melted butter and 1/4 teaspoon of salt. Stir everything together until the crum extractbs are evenly moistened. This mixture should resemble wet sand. If it feels too dry, you can add another teaspoon of melted butter. Press this mixture firmly into the bottom of a 9-inch springform pan. Using the bottom of a glass or a measuring cup can help create a compact and even crust. Make sure to press it up the sides of the pan slightly, about half an inch, to create a nice edge for our layers. Place the prepared crust in the refrigerator while you work on the filling. This chilling step will help the crust set and prevent it from crum extractbling when you slice the cheesecake.
Step 2: Create the Red Layer
Now, let’s add some patriotic flair! In a large bowl, beat the 2 packages (8 oz each) of softened cream cheese with the 2 cups of powdered sugar until smooth and creamy. Make sure there are no lumps of cream cheese remaining. This is crucial for a smooth and luscious cheesecake filling. Next, stir in 2 teaspoons of vanilla extract. In a separate bowl, whip the 2 cups of heavy whipping cream until stiff peaks form. Be careful not to over-whip, or you’ll end up with butter! Gently fold about half of the whipped cream into the cream cheese mixture to lighten it. Then, fold in the remaining whipped cream until just combined. This will give us a light and airy cheesecake filling. Now, divide this cream cheese mixture into two equal portions. To one portion, add the 1 teaspoon of red gel food color. Stir until the color is evenly distributed and you have a vibrant red hue. You can add a tiny bit more food coloring if you desire a deeper shade, but remember, gel colors are potent! Carefully spoon this red mixture over the chilled crust, spreading it evenly to the edges.
Step 3: Prepare the Blue Raspberry Layer
For the next layer of color, we’ll prepare the blue Jell-O. In a heatproof bowl, combine the blue raspberry Jell-O powder with 1 cup of boiling water. Stir thoroughly until the Jell-O is completely dissolved. This should take about 2-3 minutes of vigorous stirring. Let the Jell-O mixture cool at room temperature for about 30-45 minutes, or until it’s no longer hot but still liquid. It should be cool enough not to melt the cream cheese layer. Once cooled, gently pour this blue liquid over the red cream cheese layer. Again, spread it evenly to the edges of the pan. Place the springform pan in the refrigerator and let it chill for at least 2-3 hours, or until the Jell-O layer is firmly set. This chilling time is essential for the layers to firm up properly.
Step 4: Make the Cream Cheese Frosting “White” Layer
While the Jell-O is setting, let’s prepare our delightful white frosting layer. In a medium bowl, beat the 6 oz of softened cream cheese with the 6 tablespoons of softened butter until they are completely smooth and creamy. Ensure there are no lumps. Gradually add the 3 cups of powdered sugar, mixing until well combined and the frosting is smooth and spreadable. Stir in the 1 teaspoon of vanilla extract. If the frosting seems too thick, you can add a tablespoon of milk or cream at a time until you reach your desired consistency. You want it to be spreadable but firm enough to hold its shape.
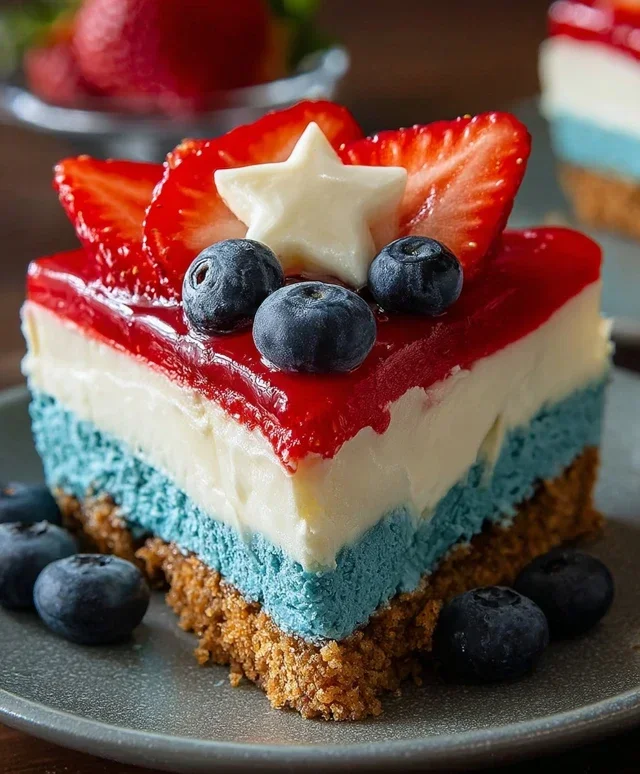
Step 5: Assemble and Garnish the Cheesecake
Once the Jell-O layer has set firmly, it’s time to add the final touch. Remove the cheesecake from the refrigerator. Carefully spoon or pipe the cream cheese frosting over the set blue Jell-O layer, spreading it evenly to create a smooth white top. For an extra festive look, you can create swirls with a spatula. Finally, arrange fresh blueberries on top of the white frosting layer in a decorative pattern, perhaps in stripes or a star shape, to complete the patriotic theme. Return the cheesecake to the refrigerator and let it chill for at least another 2-3 hours, or preferably overnight, to allow all the flavors to meld and the cheesecake to fully set. This extended chilling time is key for the best texture and flavor. When ready to serve, carefully run a knife around the edge of the springform pan before releasing the sides. Slice with a sharp knife, wiping the blade clean between each cut for neat slices. Enjoy your beautiful and delicious No Bake Patriotic Cheesecake!
Conclusion:
And there you have it – your guide to a show-stopping, incredibly easy No Bake Patriotic Cheesecake! This recipe is a true winner because it delivers all the creamy, decadent flavor of a traditional cheesecake without the fuss of baking. It’s the perfect dessert for any summer gathering, holiday celebration, or simply when you crave something sweet and festive. The vibrant red, white, and blue layers are not only visually stunning but also come together quickly, making it ideal for last-minute entertaining or a fun family activity. You can easily adapt the toppings to suit your preferences or what you have on hand. I truly encourage you to give this No Bake Patriotic Cheesecake a try – I’m confident you’ll love how simple and delicious it is!
For serving, imagin extracte this beauty as the star of your Fourth of July BBQ, Memorial Day picnic, or even just a fun weekend treat. It pairs wonderfully with fresh berries, a dollop of whipped cream, or even a drizzle of chocolate sauce for an extra indulgence. Feeling adventurous? Consider swirling in some lemon zest into the white layer for a bright citrus note, or using a different cookie crust like grabeef ham crackers mixed with finely chopped pecans for added texture.
Frequently Asked Questions:
Q: How far in advance can I make this no-bake cheesecake?
You can prepare this No Bake Patriotic Cheesecake up to 2 days in advance. Simply cover it tightly with plastic wrap and refrigerate. The flavors meld beautifully overnight, and it’s a great make-ahead option.
Q: Can I use a different type of cookie crust?
Absolutely! While a grabeef ham cracker crust is classic, you can experiment with vanilla wafers, shortbread cookies, or even Oreos (minus the filling for a darker crust). Just adjust the amount of melted butter accordingly.
Q: My cheesecake isn’t firming up. What could be wrong?
Ensure you’ve used full-fat cream cheese and heavy whipping cream, as these contribute to the setting process. Also, make sure it’s been chilled for the full recommended time. Over-mixing the cream cheese can sometimes prevent it from setting properly, so aim for just combined.
No Bake Patriotic Cheesecake
A festive and easy no-bake cheesecake perfect for patriotic holidays, featuring layers of red, white, and blue.
Ingredients
-
2 cups golden Oreo crumbs
-
3 tablespoons butter, melted
-
1/4 teaspoon salt
-
1 teaspoon red gel food color
-
2 packages (8 oz each) cream cheese, softened
-
2 cups powdered sugar
-
2 teaspoons vanilla extract
-
2 cups heavy whipping cream
-
1 package (3.94 oz) blue raspberry Jell-O
-
1 cup boiling water
-
6 oz cream cheese, softened
-
6 tablespoons butter, softened
-
3 cups powdered sugar
-
1 teaspoon vanilla extract
-
Fresh blueberries
Instructions
-
Step 1
For the crust: Combine golden Oreo crumbs, 3 tablespoons melted butter, and 1/4 teaspoon salt. Press into the bottom of a 9-inch springform pan. -
Step 2
For the red layer: Beat 2 packages (8 oz each) softened cream cheese, 2 cups powdered sugar, and 2 teaspoons vanilla extract until smooth. Add 1 teaspoon red gel food color and mix well. Whip 1 cup heavy whipping cream until stiff peaks form and fold into the cream cheese mixture. Spread evenly over the crust. -
Step 3
For the blue layer: Dissolve 1 package blue raspberry Jell-O in 1 cup boiling water. Let cool slightly. Whip the remaining 1 cup heavy whipping cream until stiff peaks form. Gently fold the slightly cooled Jell-O into the whipped cream. -
Step 4
Carefully spread the blue layer over the red layer. Chill for at least 2 hours, or until firm. -
Step 5
For the white layer (optional, can be skipped for a simpler version): Beat 6 oz softened cream cheese, 6 tablespoons softened butter, 3 cups powdered sugar, and 1 teaspoon vanilla extract until smooth. Spread evenly over the blue layer once it has set. -
Step 6
Decorate with fresh blueberries before serving. Chill for at least 6 hours or overnight for best results.
Important Information
Nutrition Facts (Per Serving)
It is important to consider this information as approximate and not to use it as definitive health advice.
Allergy Information
Please check ingredients for potential allergens and consult a health professional if in doubt.