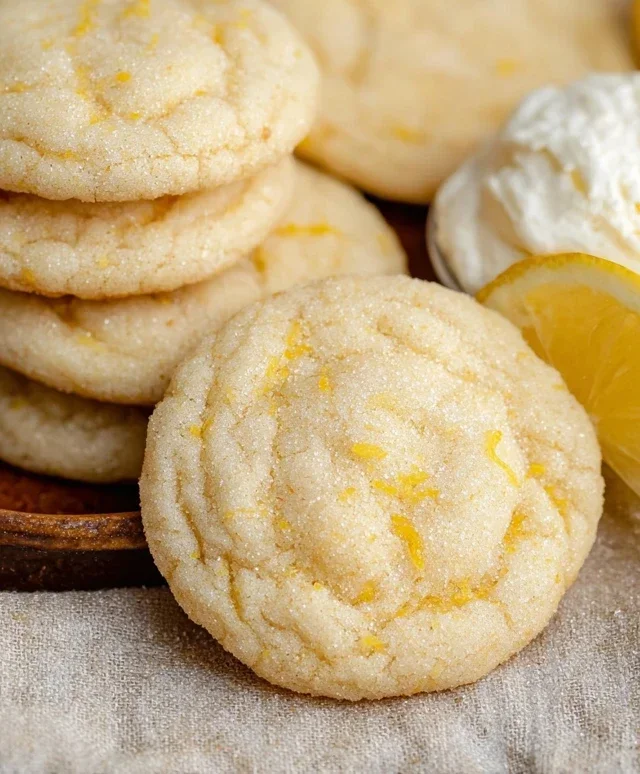
Soft Chewy Lemon Cookies-Easy Recipe-Yummy Treat
Soft & Chewy Lemon Cookies are my absolute favorite way to brighten up any day. There’s something utterly magical about that first bite – a perfect balance of tender, melt-in-your-mouth texture and a burst of vibrant, zesty lemon flavor. These aren’t just any cookies; they’re little rays of sunshine, sunshine that you can actually eat! People adore them because they offer a refreshing departure from the usual chocolate chip or sugar cookies, providing a delightful tang that awakens the palate. What makes these Soft & Chewy Lemon Cookies truly special is their irresistible combination of a wonderfully yielding interior and a subtly crisp edge, all infused with that unmistakable citrusy goodness. They’re perfect with a cup of tea, a glass of milk, or simply enjoyed on their own as a sweet treat.

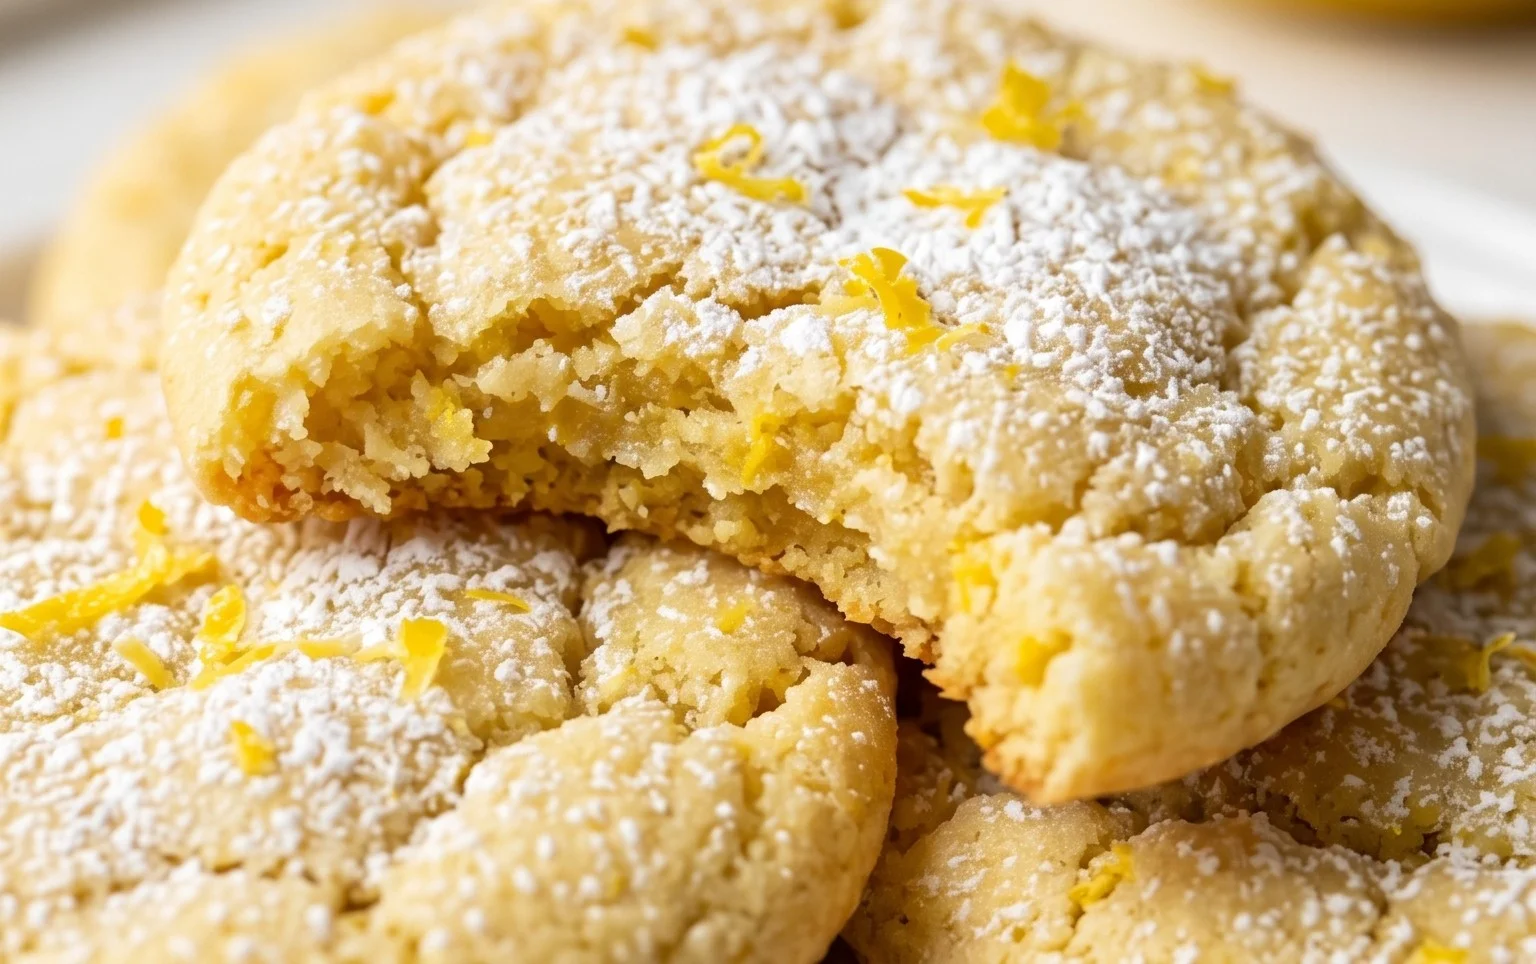
Soft & Chewy Lemon Cookies
There’s something uniquely uplifting about the bright, zesty flavor of lemon. It’s like sunshine in edible form, and when you translate that into a soft, chewy cookie, you’ve got a winner for any occasion. These Soft & Chewy Lemon Cookies are my absolute go-to when I need a little burst of happiness. They boast a tender interior, a slightly crisp edge, and an irresistible lemon punch that isn’t too overpowering. They’re wonderfully simple to make, making them perfect for a weekend baking project or a quick treat when the craving strikes. The secret to their perfect texture lies in a few key ingredients and a careful balance of wet and dry components. Let’s dive in and create some lemony magic!
Ingredients:
Instructions:
1. Creaming the Butter and Sugar: In a large mixing bowl, combine the 1 ½ cups of granulated sugar and the 3/4 cup of softened unsalted butter. It’s crucial that your butter is softened, not melted. This means it should be pliable and easy to indent with your finger, but not greasy. This step is the foundation for achieving a tender cookie. Use an electric mixer (handheld or stand mixer) to cream these ingredients together until they are light and fluffy, which usually takes about 3-5 minutes. The mixture should be pnon-alcoholic ale yellow and have a visibly airy texture. This process incorporates air, which helps the cookies rise and contributes to their soft texture.
2. Adding the Wet Ingredients: Once the butter and sugar are perfectly creamed, it’s time to add the flavor and moisture. First, add the 1 tablespoon of lemon zest. Zesting your own lemons is key here; it releases the fragrant oils in the peel, providing a much more intense and authentic lemon flavor than just using juice. Gently bruise the zest with your fingers as you add it to release even more of its aromatic oils. Next, add the room temperature large egg and the large egg yolk. Room temperature eggs incorporate more easily into the batter, creating a smoother, more cohesive dough. If your eggs are cold, you can quickly warm them by placing them in a bowl of warm (not hot) water for 5-10 minutes. Finally, add the 2 teaspoons of lemon extract. If you prefer a more nuanced flavor, feel free to use 1 teaspoon of lemon extract and 1 teaspoon of vanilla extract. Mix these wet ingredients into the creamed mixture until just combined. Don’t overmix at this stage.
3. Whisking the Dry Ingredients: In a separate medium bowl, whisk together the 3 cups of all-purpose flour, 1 teaspoon of baking soda, 1 teaspoon of cornstarch, and 3/4 teaspoon of salt. It’s important to spoon your flour into the measuring cup and level it off with a straight edge, rather than scooping directly from the bag. Scooping can pack too much flour into the cup, leading to dry, cakey cookies. Whisking the dry ingredients together ensures that the baking soda, cornstarch, and salt are evenly distributed throughout the flour. This is vital for proper leavening and flavor balance in the final cookies. The cornstarch, in particular, contributes to the tender, almost melt-in-your-mouth quality of these cookies.
4. Combining Wet and Dry and Finishing the Dough: Gradually add the dry ingredient mixture to the wet ingredients, mixing on low speed until just combined. Be careful not to overmix the dough once the flour is added. Overmixing develops the gluten in the flour, which can result in tough cookies. After the flour is mostly incorporated, add the 2 tablespoons of fresh lemon juice. The lemon juice adds a little more tang and moisture, and it also reacts with the baking soda to help with leavening. Mix until the dough just comes together. It will be a soft, slightly sticky dough. At this point, if the dough feels excessively sticky and unmanageable, you can add an extra tablespoon or two of flour, but do so sparingly.
5. Chilling and Shaping the Cookies: This is a crucial step for achieving that perfect soft and chewy texture and preventing the cookies from spreading too much. Cover the bowl with plastic wrap and refrigerate the dough for at least 30 minutes, or up to 2 days. Chilling solidifies the butter in the dough, which means it will melt more slowly in the oven, leading to thicker, chewier cookies. Once chilled, scoop the dough into 1.5-inch balls. A cookie scoop works wonderfully for uniform size. Place these dough balls onto a parchment-lined baking sheet, leaving about 2 inches between them to allow for spreading. In a small, shallow bowl, pour the ¼ cup of granulated sugar designated for rolling and garnishing. Gently roll each dough ball in the sugar until it’s evenly coated. This sugar coating will create a delightful slightly crisp exterior and add a lovely sparkle.
6. Baking to Perfection: Preheat your oven to 350°F (175°C). Place the baking sheets in the preheated oven and bake for 9-12 minutes. The exact baking time will depend on your oven and the size of your cookies. You’re looking for the edges to be lightly golden and the centers to still appear slightly soft and underbaked. They will continue to set up as they cool. For extra visual appeal and a touch more lemon intensity, you can gently press a few extra lemon zest curls or a thin slice of candied lemon onto the center of each cookie a minute or two before they finish baking. Once baked, let the cookies cool on the baking sheet for 5-10 minutes before transferring them to a wire rack to cool completely. This resting period on the baking sheet is essential for them to firm up without becoming hard. Enjoy these delightful treats with a glass of milk or a cup of tea!
Conclusion:
I truly hope you’ve enjoyed exploring this recipe for Soft & Chewy Lemon Cookies! These delightful treats are a testament to simple ingredients creating an explosion of bright, zesty flavor and an irresistible texture. The perfect balance of tender interior and slightly crisp edges makes them a guaranteed hit for any occasion. Whether you’re looking for a pick-me-up, a thoughtful homemade gift, or a crowd-pleasing dessert, these cookies deliver every time. Their vibrant lemon essence is wonderfully refreshing, cutting through richness and leaving a pleasant, lingering tang. Don’t hesitate to try this recipe; I’m confident you’ll find it incredibly rewarding and utterly delicious.
These cookies are fantastic on their own, but they also pair beautifully with a cup of hot tea or a cold glass of milk. For an extra touch of elegance, consider a light dusting of powdered sugar or a simple lemon glaze. If you’re feeling adventurous, try adding a handful of white chocolate chips for a creamy contrast, or a sprinkle of poppy seeds for visual appeal and a subtle nutty flavor. The possibilities are truly endless! Give these Soft & Chewy Lemon Cookies a bake; I can’t wait to hear how much you love them!
Frequently Asked Questions:
Q: My cookies spread too much and are flat. What went wrong?
A: This can happen for a few reasons. Ensure your butter is softened, not melted – melted butter will cause excessive spreading. Also, avoid overmixing the dough once the flour is added; overmixing develops gluten, leading to flatter cookies. Chilling the dough for at least 30 minutes before baking can also significantly help prevent spreading.
Q: Can I make these cookies dairy-free?
A: Yes, you can! Substitute the butter with a high-quality vegan butter alternative. Ensure the lemon juice and extract are also dairy-free (most are, but it’s always good to check). The texture might be slightly different, but you should still achieve a wonderfully tangy and chewy cookie.
Q: How long will these cookies stay fresh?
A: Stored in an airtight container at room temperature, these cookies will stay delightfully soft and chewy for up to 3-4 days. For longer storage, you can freeze the baked cookies for up to 2 months, or freeze the cookie dough balls for up to 3 months before baking.
Soft & Chewy Lemon Cookies
Delightfully soft and chewy lemon cookies with a bright citrus flavor.
Ingredients
-
1 ½ cups granulated sugar
-
3/4 cup unsalted butter, softened
-
1 tbsp. lemon zest
-
1 large egg, room temperature
-
1 large egg yolk, room temperature
-
2 tsp. lemon extract
-
3 cups all-purpose flour, spooned and leveled
-
1 tsp. baking soda
-
1 tsp. cornstarch
-
3/4 tsp. salt
-
2 tbsp. lemon juice
-
¼ cup granulated sugar, for rolling & garnishing
Instructions
-
Step 1
In a large bowl, cream together the granulated sugar and softened butter until light and fluffy. -
Step 2
Beat in the lemon zest, egg, egg yolk, and lemon extract until well combined. -
Step 3
In a separate bowl, whisk together the flour, baking soda, cornstarch, and salt. -
Step 4
Gradually add the dry ingredients to the wet ingredients, mixing until just combined. Stir in the lemon juice. -
Step 5
Roll dough into 1-inch balls and then roll each ball in the ¼ cup granulated sugar for rolling and garnishing. -
Step 6
Place cookies on a baking sheet lined with parchment paper, about 2 inches apart. -
Step 7
Bake in a preheated oven at 375°F (190°C) for 8-10 minutes, or until the edges are lightly golden and the centers are still soft. -
Step 8
Let cookies cool on the baking sheet for a few minutes before transferring them to a wire rack to cool completely.
Important Information
Nutrition Facts (Per Serving)
It is important to consider this information as approximate and not to use it as definitive health advice.
Allergy Information
Please check ingredients for potential allergens and consult a health professional if in doubt.