Easy Coconut Chicken Recipe- Creamy & Delicious
Coconut Chicken is one of those dishes that instantly transports me to a tropical paradise. There’s something undeniably magical about the way the creamy coconut milk melds with tender chicken, creating a sauce that is both rich and comforting. It’s no wonder why this flavorful dish has captured the hearts (and taste buds) of so many. People are drawn to it for its incredibly satisfying texture, the subtle sweetness from the coconut, and the way it can be both a simple weeknight meal and an impressive dish to share. What truly makes this Coconut Chicken recipe special is its versatility; you can adjust the spice level, add your favorite vegetables, and serve it over fluffy rice or even with warm naan bread. It’s a hug in a bowl, a taste of sunshine, and a guaranteed crowd-pleaser.
Prepare to be Enchanted
Discover Your New Favorite Coconut Chicken Recipe
Coconut Chicken
Welcome to a recipe that’s about to become a weeknight favorite! This Coconut Chicken is incredibly flavorful, comforting, and surprisingly easy to whip up. Imagin extracte tender, succulent chicken bathed in a rich, creamy, and slightly sweet coconut sauce, infused with aromatic spices. It’s the kind of dish that transports you to a tropical paradise with every bite, without needing a plane ticket. Whether you’re a seasoned cook or just starting out, this recipe is designed to be approachable and deliver maximum deliciousness. We’ll walk through each step to ensure you get perfect results every time.
Ingredients:
Cooking Instructions
This recipe is all about building layers of flavor, and it starts with properly preparing our aromatics and chicken.
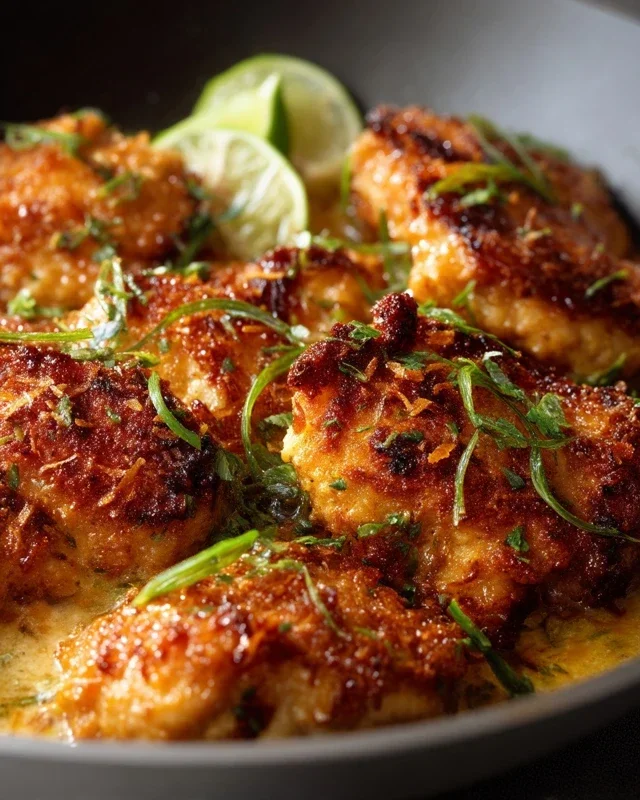
1. Searing the Chicken: Begin extract by patting your chicken pieces thoroughly dry with paper towels. This is a crucial step for achieving a beautiful sear. Season the chicken generously with salt and freshly ground black pepper. Heat the olive oil or coconut oil in a large skillet or Dutch oven over medium-high heat. Once the oil is shimmering, add the chicken pieces in a single layer. Be careful not to overcrowd the pan; cook in batches if necessary. Sear the chicken for about 2-3 minutes per side, until it’s nicely browned but not cooked through. The browning adds a fantastic depth of flavor that will carry through the entire dish. Remove the seared chicken from the skillet and set it aside on a plate. You’ll notice some browned bits stuck to the bottom of the pan – these are called fond, and they are packed with flavor, so we’ll be deglazing with them later.
2. Sautéing the Aromatics and Spices: Reduce the heat to medium. Add the chopped onion to the same skillet, using the residual oil. Cook, stirring occasionally, for about 5-7 minutes, until the onion is softened and translucent. Next, add the minced garlic and grated gin extractger. Sauté for another minute until fragrant, being careful not to burn the garlic. Now it’s time to introduce our spices. Add the curry powder, cumin, turmeric, and cayenne pepper (if using) to the skillet. Stir them into the onion mixture and cook for about 30-60 seconds, toasting the spices. This brief toasting process awakens their flavors and aromas, making them much more vibrant in the finished sauce. You’ll notice a wonderful fragrant aroma filling your kitchen.
3. Creating the Coconut Sauce Base: Pour in the full-fat coconut milk and the chicken broth. Use a wooden spoon to scrape up any browned bits from the bottom of the pan – this is how we get all that delicious flavor into our sauce. Stir everything together until well combined. Bring the mixture to a gentle simmer. Once simmering, stir in the soy sauce or tamari and the honey or maple syrup (if you’re using it for a touch of sweetness to balance the savory and spicy notes). Let this sauce simmer gently for about 5 minutes, allowing the flavors to meld and the sauce to thicken slightly. Taste the sauce at this stage and adjust seasoning with salt and pepper if needed. Remember, the soy sauce adds saltiness, so taste before adding extra salt.
4. Simmering the Chicken in the Sauce: Return the seared chicken pieces, along with any accumulated juices from the plate, back into the skillet with the simmering coconut sauce. Make sure the chicken is mostly submerged in the liquid. Cover the skillet and reduce the heat to low. Let the chicken simmer gently for about 15-20 minutes, or until it is cooked through and tender. The exact cooking time will depend on the size of your chicken pieces and whether you’re using thighs or breasts. Chicken thighs tend to stay more moist and tender, while chicken breasts can cook a bit faster. Stir occasionally to ensure the chicken cooks evenly and doesn’t stick to the bottom. This gentle simmering process allows the chicken to absorb all the wonderful flavors of the coconut sauce.
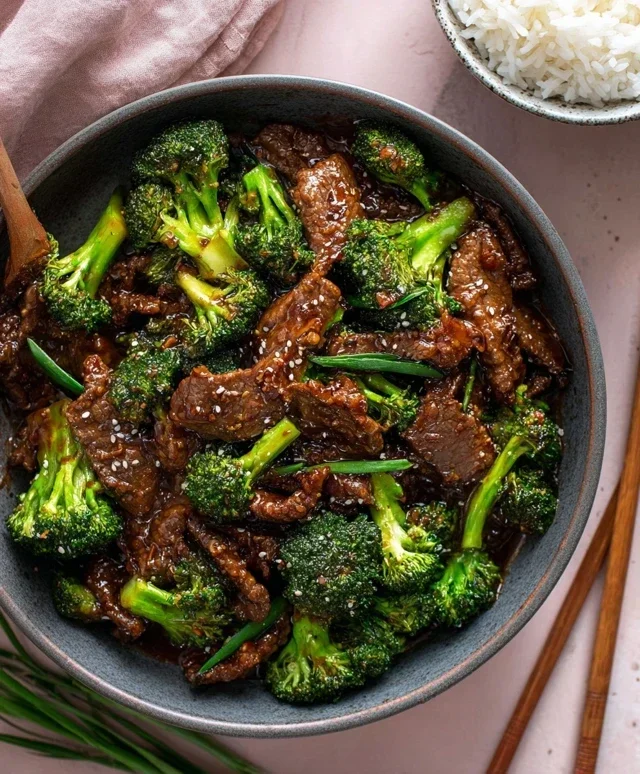
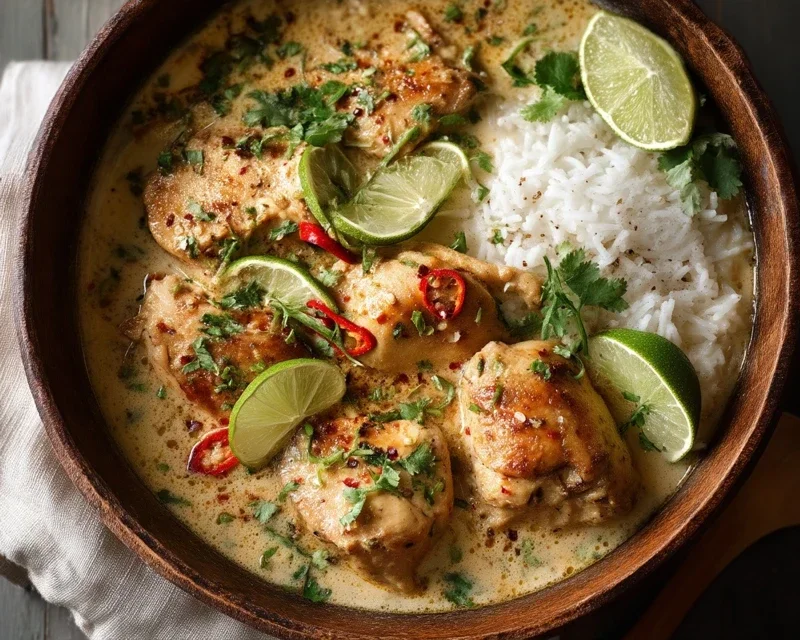
5. Final Touches and Serving: Once the chicken is cooked through and the sauce has reached your desired consistency, remove the lid. If the sauce is too thin for your liking, you can simmer it uncovered for a few extra minutes to allow it to reduce and thicken further. Alternatively, if you prefer a thicker sauce and have a bit more time, you can mix 1 tablespoon of cornstarch with 2 tablespoons of cold water to create a slurry, then whisk it into the simmering sauce and cook for another minute or two until thickened. Taste one last time for seasoning and make any final adjustments. To serve, spoon the creamy coconut chicken over a bed of fluffy cooked rice. Garnish generously with freshly chopped cilantro for a burst of freshness and color. This dish pairs beautifully with a side of steamed vegetables like broccoli or green beans. Enjoy the taste of pure comfort!
Conclusion:
I hope you’ve enjoyed learning how to make this delightful Coconut Chicken! This recipe truly stands out for its incredible balance of creamy coconut milk, tender chicken, and aromatic spices, creating a dish that is both comforting and excitingly flavorful. It’s surprisingly easy to prepare, making it a perfect option for a weeknight meal without sacrificing taste or sophistication. The rich, velvety sauce coats the chicken beautifully, and the hint of sweetness from the coconut milk is simply divine. I genuinely encourage you to give this Coconut Chicken a try; I’m confident it will become a favorite in your recipe rotation.
This versatile dish pairs wonderfully with a variety of sides. Steamed jasmine rice is a classic choice, as its subtle fragrance complements the curry. For a lighter option, consider serving it with quinoa or even cauliflower rice. You could also add some steamed broccoli or green beans for a complete meal. Don’t be afraid to experiment with variations! If you enjoy a bit of heat, add some red pepper flakes or a finely chopped chili pepper along with the garlic and gin extractger. For a burst of freshness, stir in some fresh cilantro or a squeeze of lime juice just before serving. You might even consider adding some diced bell peppers or snap peas for extra texture and color.
Frequently Asked Questions:
Can I make this Coconut Chicken ahead of time?
Yes, absolutely! The flavors of Coconut Chicken often deepen and meld beautifully when made ahead. You can prepare it up to a day in advance and reheat it gently on the stovetop or in the microwave. You may need to add a splash of water or extra coconut milk to achieve the desired consistency when reheating.
What kind of chicken works best for this recipe?
Boneless, skinless chicken thighs are my top recommendation for this Coconut Chicken. They are more forgiving and tend to stay incredibly tender and moist during cooking, absorbing the flavors of the sauce exceptionally well. However, you can also use chicken breast, but be careful not to overcook it to prevent it from drying out.
Coconut Chicken
A creamy and flavorful coconut milk-based chicken dish, perfect for a quick and satisfying meal.
Ingredients
-
1.5 pounds boneless, skinless chicken thighs, cut into bite-sized pieces
-
1 tablespoon olive oil
-
1 medium onion, thinly sliced
-
2 cloves garlic, minced
-
1 tablespoon grated fresh ginger
-
1 teaspoon curry powder
-
1 (13.5 ounce) can full-fat coconut milk
-
1/4 cup low-sodium soy sauce
-
1 tablespoon honey
-
1/2 teaspoon red pepper flakes (optional)
-
Fresh cilantro, chopped, for garnish
Instructions
-
Step 1
Heat olive oil in a large skillet or wok over medium-high heat. -
Step 2
Add chicken pieces and cook until browned on all sides. Remove chicken from the skillet and set aside. -
Step 3
Add sliced onion to the skillet and cook until softened, about 5 minutes. -
Step 4
Stir in minced garlic and grated ginger, and cook for 1 minute until fragrant. -
Step 5
Add curry powder and stir for 30 seconds. -
Step 6
Pour in coconut milk, soy sauce, and honey. Bring to a simmer. -
Step 7
Return the browned chicken to the skillet. If using, stir in red pepper flakes. -
Step 8
Simmer for 10-15 minutes, or until the chicken is cooked through and the sauce has thickened slightly. -
Step 9
Garnish with fresh cilantro before serving.
Important Information
Nutrition Facts (Per Serving)
It is important to consider this information as approximate and not to use it as definitive health advice.
Allergy Information
Please check ingredients for potential allergens and consult a health professional if in doubt.