Salted Brownie Cookies – Chewy Fudgy Delight
Salted Brownie Cookies are an absolute game-changer in the world of baked goods, and I’m so thrilled to share this recipe with you. If you’ve ever found yourself torn between the rich, fudgy indulgence of a brownie and the satisfying chew of a perfect cookie, then this is your ultimate answer. These Salted Brownie Cookies manage to capture the very best of both worlds, delivering an intense chocolate experience that will have you reaching for another (or two!) in no time. We all know the universal appeal of a classic brownie, that deep, dark chocolate flavor that just hits the spot. And who doesn’t love a cookie that’s wonderfully chewy with just the right amount of crisp around the edges? What makes these Salted Brownie Cookies truly special is that magical marriage of textures and tastes. The hint of flaky sea salt on top isn’t just for show; it masterfully cuts through the sweetness, amplifying the cocoa’s complexity and creating a truly addictive flavor profile that is simply irresistible.
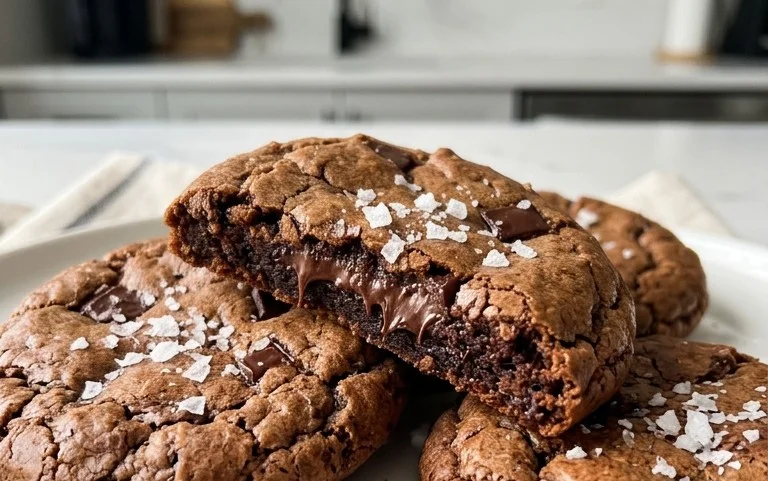
Salted Brownie Cookies
Get ready to experience pure indulgence with these Salted Brownie Cookies! If you’re a brownie lover who also craves the satisfying chew of a cookie, then this recipe is tailor-made for you. We’re combining the rich, fudgy intensity of brownies with the delightful crisp edges and chewy center of a perfectly baked cookie, all finished with a sprinkle of flaky sea salt to elevate every bite. These cookies are wonderfully decadent, incredibly easy to make, and guaranteed to disappear faster than you can say “second helping.” They’re perfect for satisfying a sweet craving, impressing guests, or simply treating yourself to something truly special.
The magic of these cookies lies in their brownie-like texture and intense chocolate flavor. We’re using a generous amount of cocoa powder and semi-sweet chocolate chips to achieve that signature deep chocolate taste. The addition of espresso powder, while optional, truly amplifies the chocolate notes without making the cookies taste like coffee – it’s a secret weapon for maximum chocolate impact! The combination of a slightly underbaked center and crispy edges creates a textural marvel that will have you reaching for another. And of course, the finishing touch of flaky sea salt is non-negotiable for that perfect sweet and salty balance. Let’s get baking!
Ingredients:
Instructions:
Prep and Dry Ingredients: Begin extract by preheating your oven to 350°F (175°C). Line baking sheets with parchment paper. In a medium bowl, whisk together the 1 cup of all-purpose flour, 1 teaspoon of baking powder, and the 1/8 teaspoon of salt. This ensures your leavening agents and salt are evenly distributed throughout the cookie dough, preventing pockets of bitterness or uneven rising. Set this dry mixture aside.
Melt the Chocolate and Butter: In a heatproof bowl set over a saucepan of simmering water (or in the microwave in 30-second increments, stirring in between), melt the 6 tablespoons of unsalted butter until completely liquid. Once the butter is melted, add the 1 cup of semi-sweet chocolate chips to the bowl with the butter. Stir gently until the chocolate is smooth and fully incorporated into the butter, creating a rich, glossy chocolate mixture. If you’re using the optional espresso powder, whisk it in at this stage to allow it to bloom in the warm chocolate and butter mixture, enhancing its flavor. Remove the bowl from the heat and let the chocolate mixture cool slightly for a few minutes. It should still be warm, but not so hot that it will scramble the eggs.
Combine Wet Ingredients and Chocolate Mixture: In a large bowl, whisk together the 2 large eggs (at room temperature, which helps them emulsify better into the batter), the 1 large egg yolk (also at room temperature, for richness and chegrape juicess), and the 1 cup of granulated sugar until well combined and slightly lighter in color. Stir in the 1 tablespoon of vegetable oil and the 1 teaspoon of vanilla extract. Now, pour the slightly cooled, melted chocolate and butter mixture into the egg and sugar mixture. Whisk everything together until it’s smooth and homogenous, creating a beautifully rich, dark batter. This is where the brownie flavor really starts to come alive!
Combine Wet and Dry Ingredients: Gradually add the reserved dry ingredients (flour, baking powder, and salt) to the wet chocolate mixture. Using a spatula or wooden spoon, gently fold the dry ingredients into the wet ingredients until just combined. Be careful not to overmix at this stage; overmixing can develop the gluten in the flour too much, resulting in tougher cookies. You want to stop mixing as soon as you no longer see streaks of dry flour. The dough will be thick and fudgy, reminiscent of brownie batter. Gently fold in an additional 1/2 cup of semi-sweet chocolate chips into the dough.
Shape and Bake: Drop rounded tablespoons of dough onto the prepared baking sheets, leaving about 2 inches between each cookie. For that classic brownie-like appearance and texture, resist the urge to flatten the dough balls too much; they will spread slightly as they bake. If you like, press a few extra semi-sweet chocolate chips onto the tops of each cookie dough ball before baking. This not only adds visual appeal but ensures pockets of melted chocolate throughout your finished cookies. Bake for 10-13 minutes, or until the edges are set and slightly crisp, but the centers still look soft and slightly underbaked. This is crucial for achieving that signature chewy, fudgy interior.
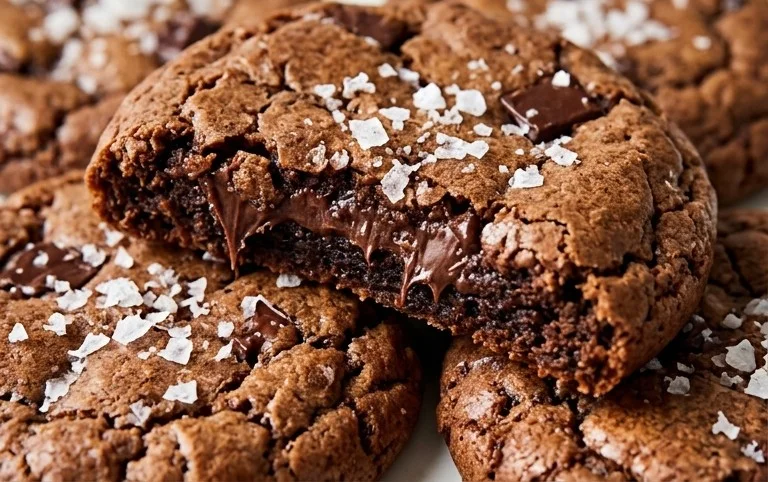
Cool and Garnish: Once baked, remove the cookies from the oven and let them cool on the baking sheets for about 5-10 minutes. This allows them to set up properly. As soon as you take them out of the oven, and while they are still warm, sprinkle a few flaky sea salt flakes on top of each cookie. The warmth of the cookie will help the salt adhere. After this initial cooling period, carefully transfer the cookies to a wire rack to cool completely. The combination of the warm chocolate, the chewy interior, the slightly crisp edges, and that touch of sea salt is what makes these Salted Brownie Cookies an absolute triumph. Enjoy!
Conclusion:
And there you have it – the ultimate guide to creating these utterly irresistible Salted Brownie Cookies! This recipe is a true winner because it delivers that intense, fudgy brownie flavor we all crave, perfectly balanced with a hint of flaky sea salt. The chewy texture, rich chocolate notes, and that delightful salty finish make these cookies an absolute showstopper. They’re incredibly versatile, too. Imagin extracte serving these warm from the oven with a scoop of vanilla bean ice cream for a decadent dessert, or packing them into a tin for a thoughtful homemade gift. For even more fun, consider adding a sprinkle of toasted nuts like walnuts or pecans for an extra crunch, or swirling in some caramel before baking for a salted caramel brownie cookie experience. I truly encourage you to give these salted brownie cookies a try; they are surprisingly simple to make and the results are profoundly rewarding. Prepare to impress yourself and anyone lucky enough to share these with you!
Frequently Asked Questions about Salted Brownie Cookies:
Q: Can I make these cookies ahead of time?
Absolutely! The dough can be chilled for up to 3 days, allowing the flavors to deepen. You can also bake them completely and store them in an airtight container at room temperature for up to 5 days. They’re often even better on the second day!
Q: What kind of chocolate is best to use?
For the most authentic brownie flavor, I recommend using a good quality semi-sweet or bittersweet chocolate. Using a mix of both can also add wonderful complexity. Avoid milk chocolate, as it might make the cookies too sweet and less intensely chocolatey.
Q: My cookies spread too much. What went wrong?
This can happen for a few reasons. Ensure your butter isn’t too soft or melted when you cream it with the sugar. Also, chilling the dough before baking is crucial for controlling spread and achieving that classic brownie cookie texture. Make sure your oven temperature is accurate as well.
Salted Brownie Cookies
Rich, fudgy brownie cookies with a hint of sea salt for a perfect sweet and salty balance.
Ingredients
-
1 cup All-Purpose Flour
-
1 tsp Baking Powder
-
1/8 tsp Salt
-
2 Large Eggs (room temperature)
-
1 Large Egg Yolk (room temperature)
-
1 cup Granulated Sugar
-
1 tbsp Vegetable Oil
-
1 tsp Vanilla Extract
-
6 tbsp Unsalted Butter
-
1 cup Semi-Sweet Chocolate Chips (plus some for topping cookies)
-
1/4 cup Unsweetened Cocoa Powder
-
1 tsp Espresso Powder (optional)
-
Sea Salt Flakes (for topping cookies (optional garnish))
Instructions
-
Step 1
In a medium bowl, whisk together the all-purpose flour, baking powder, and 1/8 tsp salt. Set aside. -
Step 2
In a large bowl, beat together the room temperature eggs, egg yolk, granulated sugar, vegetable oil, and vanilla extract until well combined. -
Step 3
Melt the unsalted butter in a microwave-safe bowl or in a small saucepan. Stir in the semi-sweet chocolate chips and whisk until smooth. Stir in the unsweetened cocoa powder and optional espresso powder until fully incorporated. -
Step 4
Pour the melted chocolate mixture into the egg and sugar mixture and whisk until smooth and glossy. -
Step 5
Gradually add the dry ingredients to the wet ingredients, mixing until just combined. Do not overmix. -
Step 6
Cover the bowl and refrigerate the dough for at least 30 minutes. This helps the cookies hold their shape. -
Step 7
Preheat your oven to 350°F (175°C). Line baking sheets with parchment paper. -
Step 8
Scoop rounded tablespoons of dough onto the prepared baking sheets, leaving about 2 inches between cookies. Press a few extra chocolate chips onto the tops of the cookies. Sprinkle with sea salt flakes if desired. -
Step 9
Bake for 10-12 minutes, or until the edges are set and the centers are still slightly soft. Do not overbake. -
Step 10
Let the cookies cool on the baking sheets for a few minutes before transferring them to a wire rack to cool completely.
Important Information
Nutrition Facts (Per Serving)
It is important to consider this information as approximate and not to use it as definitive health advice.
Allergy Information
Please check ingredients for potential allergens and consult a health professional if in doubt.