No Yeast Pizza Dough – Quick Easy Homemade Pizza
An excellent No Yeast Pizza Dough is your secret weapon for spontaneous pizza nights, and trust me, it’s a game-changer! Forget the fuss of proofing and waiting for yeast to work its magic. This recipe delivers that satisfyingly chewy, slightly crisp crust that we all crave, in a fraction of the time. It’s perfect for those evenings when hunger strikes unexpectedly, or when you simply don’t have time for traditional methods. What makes this no yeast pizza dough so special is its incredible versatility and forgiving nature. It comes together in minutes with pantry staples, making homemade pizza accessible to everyone, regardless of experience level. Imagin extracte the aroma filling your kitchen – that’s the smell of quick, easy, and utterly delicious homemade pizza, made possible by this fantastic recipe!
An Excellent No-Yeast Pizza Dough – Quick & Easy Homemade Pizza!
Craving pizza but don’t have the time (or patience!) for yeast dough? Look no further! This no-yeast pizza dough recipe is a game-changer. It’s incredibly quick to whip up, uses pantry staples, and results in a delightfully chewy and slightly crispy crust that’s perfect for all your favorite toppings. Forget last-minute takeout; you can have delicious homemade pizza on the table in under an hour with this simple recipe. This is my go-to when pizza night calls, and it never disappoints.
Ingredients:
Instructions:
This recipe is designed for speed and simplicity. You’ll be amazed at how easily this dough comes together.
1. Combine the Dry Ingredients
In a medium-sized mixing bowl, add your flour, baking powder, salt, and sugar. Baking powder is our secret weapon here, acting as a leavening agent to give the dough its lift without yeast. Whisk these dry ingredients together thoroughly. This ensures that the baking powder and salt are evenly distributed throughout the flour, which is crucial for a consistent texture in your pizza crust. A good whisking at this stage prevents pockets of salt or under-leavened sections.
2. Incorporate Wet Ingredients and Form Dough
Now, make a well in the center of your dry ingredients. Pour in the olive oil and the cold tap water. Use a fork or a spatula to begin extract mixing everything together. Start from the center and gradually pull in the dry ingredients from the sides. Continue mixing until a shaggy dough begin extracts to form. Don’t overmix at this stage; we’re just looking to bring it all together. The dough will be sticky at first, which is perfectly normal. Avoid the temptation to add too much extra flour right away, as this can make the crust tough.
3. Knead the Dough (Briefly!)
Turn the shaggy dough out onto a lightly floured surface. This is where you’ll use that extra tablespoon of flour for dusting your work surface and your hands. Knead the dough for just about 1 to 2 minutes. You’re not looking for a developed gluten structure like you would with yeast dough. The goal here is simply to bring the dough together into a cohesive ball, making it smooth and elastic enough to handle. Over-kneading will develop too much gluten, resulting in a tough crust. A few gentle folds and presses are all you need.
4. Shape and Prepare for Toppings
Once your dough is nicely formed, you can either shape it immediately or let it rest for a few minutes for easier handling. I often find a brief 5-10 minute rest helps make it even more pliable. To shape, gently press the dough down with your fingertips from the center outwards to form a circle or an oval. You can also use a rolling pin if you prefer a more uniform thickness, but I love the rustic feel of pressing it by hand. Aim for about a 10-12 inch pizza base, depending on how thick or thin you like your crust. If you plan to brush the crust with oil for extra crispiness and color, do that now with your optional vegetable oil. This step adds a lovely golden hue and a satisfying crunch to the edges.
5. Bake Your Masterpiece!
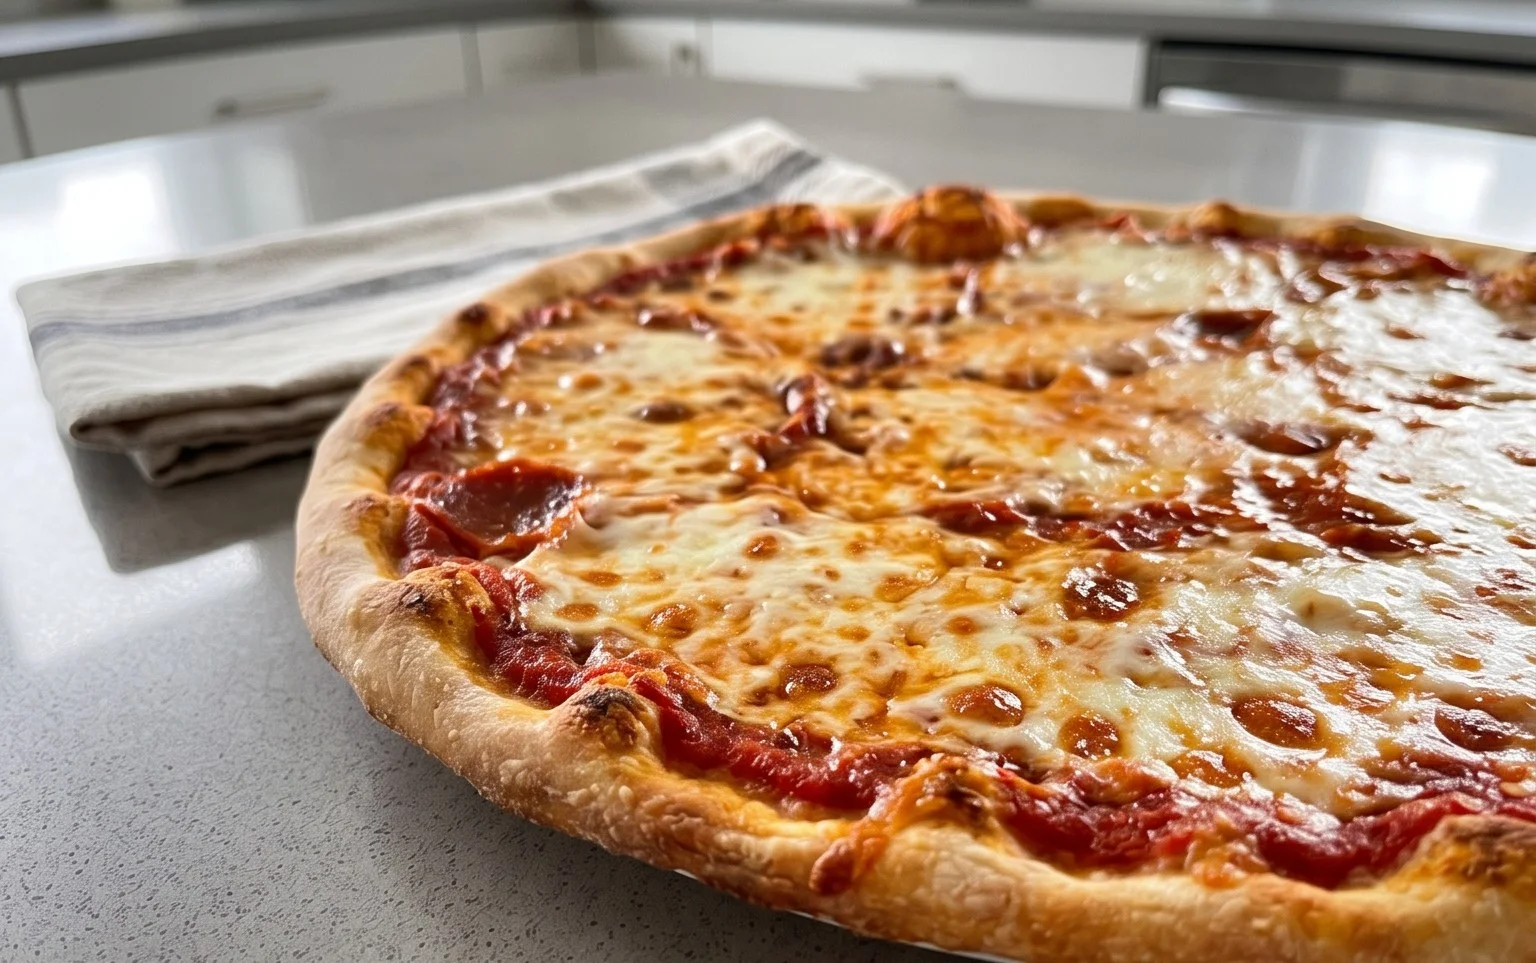
Preheat your oven to a hot 450°F (230°C). A hot oven is key for a good pizza crust, mimicking the conditions of a pizza oven. Place your shaped pizza dough onto a baking sheet, pizza stone, or directly onto an oven rack if you’re feeling brave (and your dough is sturdy!). Add your favorite pizza sauce, cheese, and toppings. Make sure not to overload your pizza, as too many wet toppings can make the crust soggy. Bake for 12-18 minutes, or until the crust is golden brown and the cheese is bubbly and slightly browned. The exact baking time will depend on your oven and the thickness of your crust. Keep an eye on it, especially towards the end, to prevent burning. Once out of the oven, let it cool for just a minute or two before slicing and enjoying your incredible homemade pizza!

Conclusion:
You’ve just learned how to make an excellent no yeast pizza dough that proves you don’t need hours for a fantastic homemade pizza! This recipe is a game-changer for weeknight dinners or spontaneous pizza cravings because it’s incredibly quick and easy to whip up. Forget waiting for dough to rise; this recipe delivers a delicious, chewy crust with minimal effort, making it perfect for begin extractners and busy home cooks alike. Its simplicity allows you to focus on the fun part: topping your pizza to perfection!
Serve your freshly baked pizza hot from the oven with your favorite toppings. It’s wonderful with classic combinations like beef pepperoni and mushroom, or get creative with pesto and fresh mozzarella, or even a white pizza with garlic and ricotta. This versatile dough is also a fantastic base for calzones or mini pizza bites!
Don’t hesitate to experiment! For a touch of Italian flair, consider adding dried herbs like oregano or basil directly into the dough. If you’re feeling adventurous, a sprinkle of garlic powder can elevate the flavor even further. This no yeast pizza dough is truly a foundation for endless pizza possibilities. Give it a try – I’m confident you’ll love the speed and delicious results!
Frequently Asked Questions:
Q: Can I make this dough ahead of time?
Yes, absolutely! You can prepare the dough and store it in an airtight container or a ziplock bag in the refrigerator for up to 2-3 days. When you’re ready to use it, simply take it out of the fridge about 30 minutes before you plan to shape and bake it to allow it to come to room temperature.
Q: My dough is a bit sticky. What should I do?
A little stickiness is normal, especially if your flour absorption is slightly different. Instead of adding too much extra flour (which can make the crust tough), lightly flour your hands and your work surface. You can also try using a bench scraper to help manage and shape the dough. The key is to work with it gently.
An excellent No Yeast Pizza Dough – quick easy homemade pizza!
A quick and easy homemade pizza dough recipe that doesn’t require yeast, perfect for a speedy weeknight meal.
Ingredients
-
1 1/3 cups bread flour
-
2 tsp baking powder
-
3/4 tsp salt
-
3/4 tsp sugar
-
2 tsp olive oil
-
1/2 cup cold tap water
-
1 tbsp Extra Flour (, for dusting)
-
2 tsp vegetable oil (, for brushing crust (optional))
Instructions
-
Step 1
In a large bowl, whisk together the flour, baking powder, salt, and sugar. -
Step 2
Add the olive oil and cold water to the dry ingredients. Stir with a fork or spatula until a shaggy dough forms. -
Step 3
Turn the dough out onto a lightly floured surface. Knead for about 5-7 minutes, or until smooth and elastic. Add a little extra flour if the dough is too sticky. -
Step 4
Shape the dough into a ball. You can use it immediately or let it rest for 10-15 minutes if you prefer a slightly softer texture. -
Step 5
Preheat your oven and pizza stone or baking sheet according to your pizza topping recipe. Roll or stretch the dough to your desired pizza shape. -
Step 6
If desired, brush the crust with vegetable oil for a golden finish.
Important Information
Nutrition Facts (Per Serving)
It is important to consider this information as approximate and not to use it as definitive health advice.
Allergy Information
Please check ingredients for potential allergens and consult a health professional if in doubt.