No Bake Cookie Dough Cheesecake-Easy Dessert
No Bake Cookie Dough Cheesecake. Oh, just saying those words conjures up images of pure, unadulterated dessert bliss. If you’re anything like me, you probably have a deep and abiding love for both classic cheesecake and the irresistible allure of edible cookie dough. What if I told you that you don’t have to choose? This incredible No Bake Cookie Dough Cheesecake recipe is the perfect marriage of two beloved treats, offering a creamy, dreamy cheesecake base studded with chunks of decadent, safe-to-eat cookie dough. It’s the ultimate indulgence, requiring absolutely zero oven time, making it a lifesaver for busy bakers or those who prefer to keep their kitchens cool. The secret to its magic lies in the harmonious blend of textures and flavors – the smooth, tangy cheesecake frosting, the sweet, buttery cookie dough bites, and often a delightful cookie crust. It’s a guaranteed crowd-pleaser that always disappears in a flash, leaving everyone beggin extractg for the recipe.
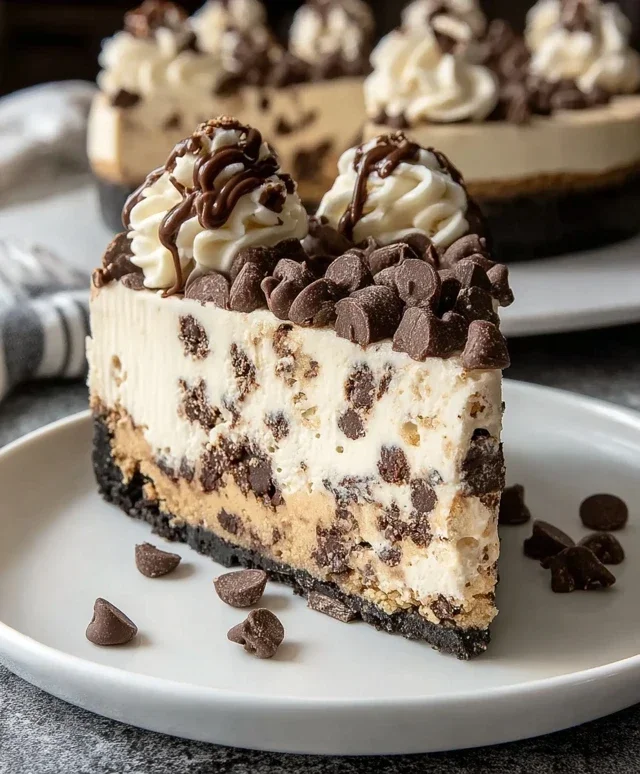
No Bake Cookie Dough Cheesecake
Get ready to indulge in a dessert dream! This No Bake Cookie Dough Cheesecake is a symphony of flavors and textures, combining the irresistible allure of raw cookie dough with the creamy decadence of cheesecake, all without ever turning on your oven. It’s the perfect dessert for those days when you crave something sweet but don’t want the fuss of baking. The base is a buttery, slightly salty crum extractb, reminiscent of a perfect chocolate chip cookie, topped with a rich, velvety cheesecake filling studded with delightful cookie dough bites. Finally, a swirl of stabilized whipped cream and a sprinkle of extra chocolate chips makes it a showstopper. This recipe is surprisingly simple to put together, making it ideal for begin extractners and seasoned bakers alike. Let’s get started on creating this masterpiece!
Ingredients:
Cookie Dough Base
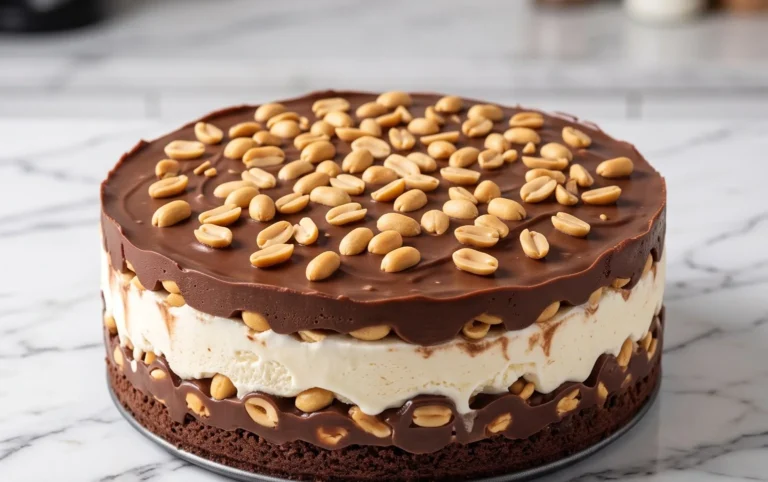
The foundation of our cheesecake is a no-bake cookie dough crust. This isn’t your typical grabeef ham cracker crust. We’re building something even more exciting here!
Creamy Cheesecake Filling
This is where we achieve that signature creamy, dreamy cheesecake texture. The secret is using softened cream cheese and a good amount of powdered sugar for sweetness and structure.
Finishing Touches
This is where we make our cheesecake look as good as it tastes! A few simple additions elevate this dessert to the next level.
Conclusion:
And there you have it – the ultimate No Bake Cookie Dough Cheesecake recipe! This dessert truly embodies effortless indulgence. It’s incredibly simple to whip up, requires no oven time, and delivers that perfect creamy cheesecake texture with the irresistible flavor and chew of cookie dough. The beauty of this recipe lies in its straightforward approach, making it accessible for bakers of all levels. I encourage you to give this no bake cookie dough cheesecake a try – I promise you won’t be disappointed!
Serve this delightful creation chilled, perhaps with a drizzle of extra chocolate sauce or some fresh berries for a pop of color and freshness. For variations, consider adding mini chocolate chips directly into the cheesecake filling, or even using different flavored cookie dough – like peanut butter or white chocolate chip! You could also experiment with a different cookie crum extractb for the base, such as Oreos or grabeef ham crackers.
Frequently Asked Questions:
Can I make this vegan?
Absolutely! You can easily make this no bake cookie dough cheesecake vegan by using vegan cream cheese, a plant-based butter substitute, and vegan cookie dough (ensure it’s egg-free and dairy-free). For the crust, a vegan grabeef ham cracker or even a vegan chocolate cookie base will work beautifully.
How long does it last in the refrigerator?
This delicious no bake cookie dough cheesecake will stay fresh in the refrigerator for up to 3-4 days when stored in an airtight container. The texture is best when enjoyed within the first couple of days.
Can I freeze leftovers?
Yes, you can freeze leftovers. It’s best to freeze individual slices wrapped tightly in plastic wrap and then placed in an airtight container or freezer bag. Thaw overnight in the refrigerator before enjoying.
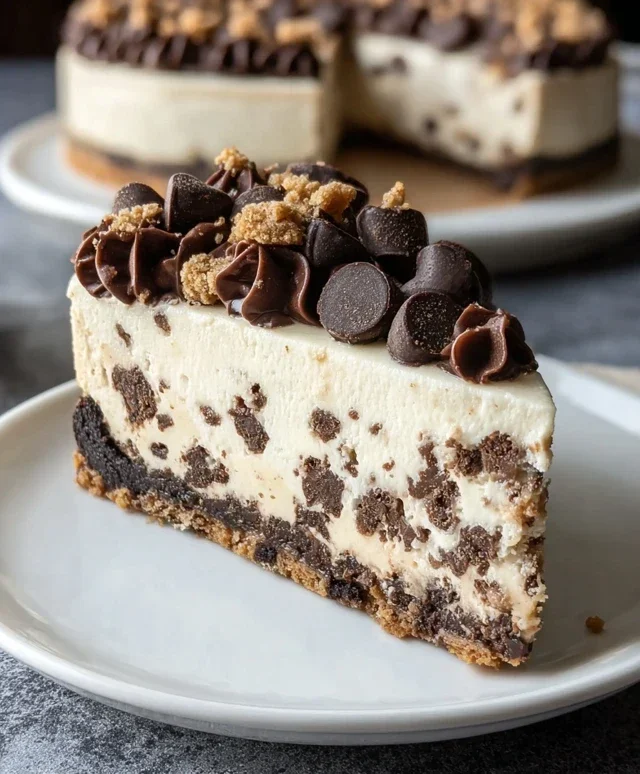
No Bake Cookie Dough Cheesecake
A decadent no-bake cheesecake featuring a cookie dough flavor, layered with cookie dough balls and topped with whipped cream and chocolate chips.
Ingredients
-
1 ¾ cups all-purpose flour
-
1 cup unsalted butter, softened
-
¾ cup light brown sugar, packed
-
½ cup granulated sugar
-
2 tablespoons heavy cream, cold
-
1 ½ teaspoons vanilla extract
-
¼ teaspoon salt
-
1 ¼ cups mini semi-sweet chocolate chips
-
24 ounces cream cheese, softened
-
1 ½ cups powdered sugar, sifted, divided
-
1 ¼ cups heavy cream, very cold
-
8 ounces whipped topping
-
2 tablespoons mini semi-sweet chocolate chips
-
10 edible cookie dough balls
Instructions
-
Step 1
Prepare the crust: In a bowl, combine 1 ¾ cups all-purpose flour, softened butter, ¾ cup packed light brown sugar, ½ cup granulated sugar, and ¼ teaspoon salt. Mix until well combined, resembling coarse crumbs. Press this mixture into the bottom of a 9-inch springform pan. -
Step 2
Make the cookie dough filling: In a separate bowl, beat softened cream cheese until smooth. Gradually add 1 cup of sifted powdered sugar and 1 ½ teaspoons vanilla extract, beating until smooth and creamy. Stir in 1 ¼ cups mini semi-sweet chocolate chips and the 10 edible cookie dough balls. Gently fold in the whipped topping until just combined. -
Step 3
Assemble the cheesecake: Spread the cookie dough filling evenly over the prepared crust. -
Step 4
Prepare the whipped topping: In a chilled bowl, whip the 1 ¼ cups very cold heavy cream with the remaining ½ cup sifted powdered sugar and 1 ½ teaspoons vanilla extract until stiff peaks form. Gently fold in the 2 tablespoons cold heavy cream. -
Step 5
Decorate the cheesecake: Spread the prepared whipped topping over the cookie dough filling. Sprinkle with 2 tablespoons mini semi-sweet chocolate chips. -
Step 6
Chill the cheesecake: Cover the cheesecake and refrigerate for at least 4 hours, or until firm.
Important Information
Nutrition Facts (Per Serving)
It is important to consider this information as approximate and not to use it as definitive health advice.
Allergy Information
Please check ingredients for potential allergens and consult a health professional if in doubt.