Mini Cannoli Cups- Irresistible Italian Dessert Bites
Mini cannoli cups are about to become your new obsession! Forget the fuss of rolling traditional cannoli shells; these delightful little bites deliver all the classic, irresistible flavor in a way that’s wonderfully accessible for home bakers. Who doesn’t adore the iconic crispiness of a cannoli shell, cradling a sweet, creamy ricotta filling? It’s that perfect textural contrast, that whisper of citrus and vanilla, that transports us straight to Sicily with every bite. What makes these mini cannoli cups truly special, though, is their adaptability. They’re perfect for parties, a charming addition to dessert tables, or simply a sweet treat to enjoy yourself. We’ve found a way to capture that authentic cannoli magic without the intimidation, offering you a shortcut to pure confectionary bliss.
Mini Cannoli Cups
Looking for a delightful dessert that’s impressive yet surprisingly easy to make? These Mini Cannoli Cups are the perfect solution! They capture all the beloved flavors and textures of traditional cannoli – the crisp shell, the creamy, sweet ricotta filling, and a hint of citrus – but in a convenient, bite-sized format that’s ideal for parties, gatherings, or just a special treat for yourself. Forget the fuss of rolling and frying dough; we’re using simple refrigerated pie crusts to create a shortcut that’s just as delicious. Get ready to wow your taste buds and your guests with these charming little delights.
Ingredients:
Preparing the Ricotta Filling
The heart of any cannoli is its rich, creamy filling. To achieve the perfect texture, it’s crucial to drain your ricotta cheese thoroughly. You can do this by placing it in a fine-mesh sieve lined with cheesecloth or a coffee filter, and letting it sit over a bowl in the refrigerator for at least an hour, or even overnight. This removes excess moisture, preventing a watery filling. Once drained, transfer the ricotta to a medium bowl. Add the powdered sugar, granulated sugar, your chosen citrus zest (orange or lemon), and vanilla extract. Use a spatula or a handheld mixer on low speed to gently combine all the ingredients until smooth and well incorporated. Don’t overmix, as this can also affect the texture. Taste the filling and adjust sweetness if needed. Cover the bowl and refrigerate the filling while you prepare the crusts.
Creating the Cannoli Shells
This is where the magic of convenience comes in! Start by preheating your oven to 375 degrees Fahrenheit (190 degrees Celsius). Lightly grease a mini muffin tin or a mini cupcake pan. If you don’t have a mini muffin tin, a regular muffin tin will work, but your “cups” will be larger. Unroll the softened refrigerated pie crusts onto a lightly floured surface. Using a round cookie cutter or a glass that’s slightly larger than the cavities of your muffin tin (about 2.5 to 3 inches in diameter for a mini muffin tin), cut out as many circles as possible from each crust. You’ll want to have enough circles to line all the cups in your muffin tin. Gently press each dough circle into the prepared muffin tin cups, making sure it fits snugly and comes up the sides. Prick the bottom of each dough cup a few times with a fork. This helps to prevent the dough from puffing up too much during baking.
Baking the Shells to Perfection
Now, it’s time to bake these little edible bowls. Place the muffin tin in the preheated oven. Bake for approximately 10 to 14 minutes, or until the edges of the crusts are golden brown and lightly crispy. The baking time may vary depending on your oven, so keep a close eye on them. Once baked, carefully remove the muffin tin from the oven. Let the crusts cool in the tin for about 5 minutes. This allows them to firm up slightly, making them easier to remove. Then, gently invert the tin onto a wire rack to release the baked cannoli cups. If any seem a little stubborn, you can use a small offset spatula or a butter knife to help loosen them. Let them cool completely on the wire rack before filling. This step is crucial; filling warm cups will make the filling melt and the shells soggy.
The Finishing Touches
While the crusts are cooling, prepare your topping mixture. In a small shallow bowl, combine the turbinado sugar and ground cinnamon. This fragrant mixture will be used to coat the edges of our cannoli cups, adding a delightful crunch and warm spice. Once the cannoli cups are completely cool, it’s time for the grand finnon-alcoholic ale! Gently spoon or pipe the prepared ricotta filling into each cooled cannoli cup. Don’t overfill them; you want them to be neat and easy to handle. Now, take your time to dip the edges of the filled cannoli cups into the turbinado sugar and cinnamon mixture, or sprinkle it generously over the top. Finally, adorn the tops with your chosen garnish: miniature semisweet chocolate chips or finely chopped pistachios. For an extra touch of elegance, dust a little more powdered sugar over the finished mini cannoli cups. Serve immediately and enjoy the delightful symphony of textures and flavors!
Conclusion:
So there you have it – the ultimate guide to creating delightful Mini Cannoli Cups! This recipe truly shines because it offers all the classic, irresistible cannoli flavor and texture in a perfectly portioned, bite-sized format. They’re fantastic for parties, easy to manage at gatherings, and provide that satisfying crunch followed by a creamy, sweet filling. I find they’re wonderful served chilled, making them a refreshing treat, especially during warmer months. They also look incredibly elegant on any dessert table, adding a touch of Italian flair.
For serving suggestions, I love presenting them on a tiered stand or arranged artfully on a platter. You can also dust them with a little extra powdered sugar just before serving for an extra visual appeal. Don’t be afraid to get creative with variations! Consider adding a hint of orange zest or a dash of cinnamon to your ricotta filling for a different flavor profile. Chopped pistachios, mini chocolate chips, or even a drizzle of chocolate ganache on top are also fantastic additions that elevate these mini delights. I truly encourage you to give this recipe a try; I’m confident you’ll fall in love with how simple and rewarding it is to make these delicious Mini Cannoli Cups!
Frequently Asked Questions:
Can I make the cannoli shells ahead of time?
Absolutely! You can prepare the cannoli shells a day or two in advance and store them in an airtight container at room temperature. It’s best to fill them closer to serving time to ensure they maintain their crispness.
What’s the best way to store leftover filled mini cannoli cups?
If you have any leftovers, it’s best to store them in an airtight container in the refrigerator. Keep in mind that the shells will soften over time once filled, so they are best enjoyed within a day or two.
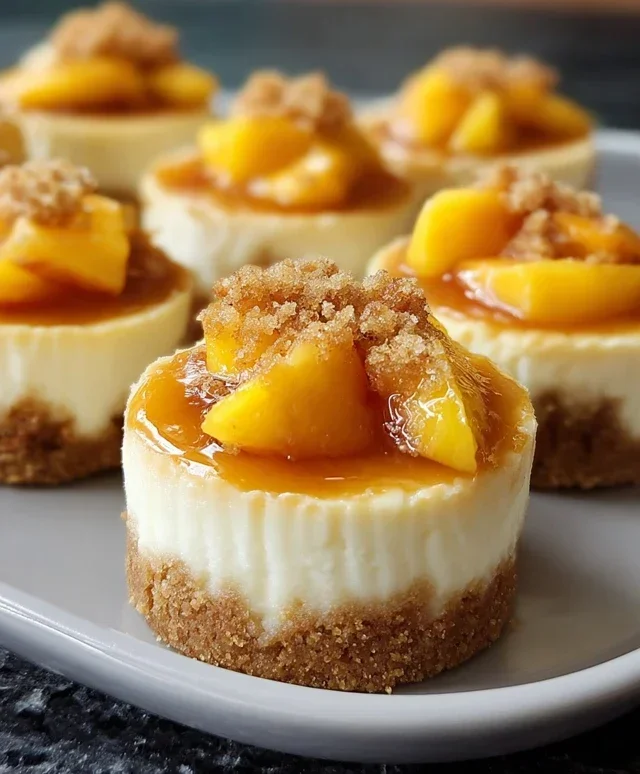
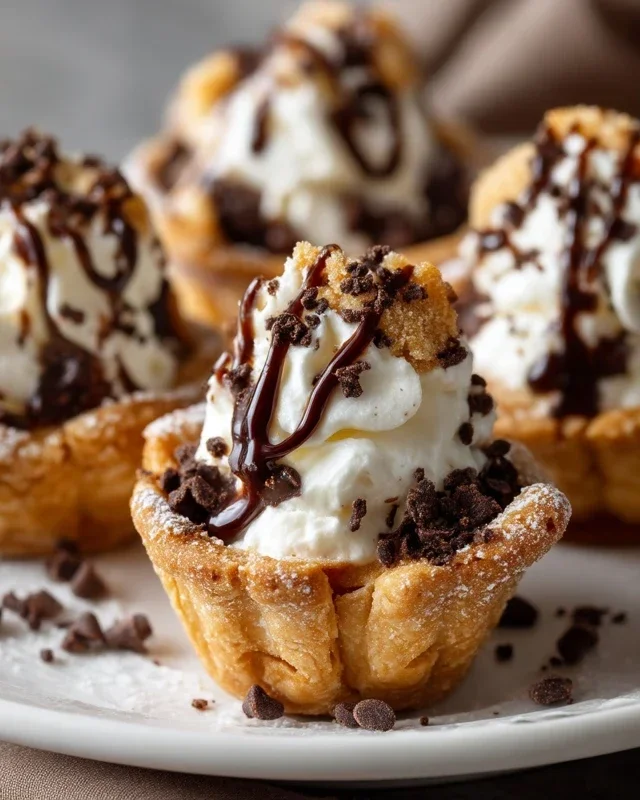
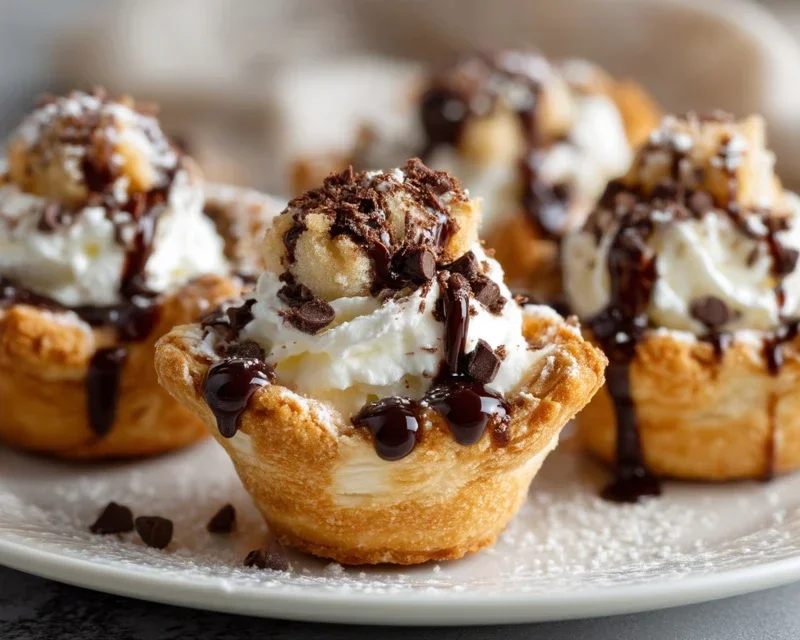
Mini Cannoli Cups
Delightful mini cannoli cups with a creamy ricotta filling, encased in a crisp pie crust shell and topped with chocolate chips or pistachios.
Ingredients
-
1 container whole-milk ricotta cheese (15 oz., drained)
-
1/2 cup powdered sugar
-
2 tablespoons granulated sugar
-
1 teaspoon finely grated orange zest
-
1/2 teaspoon vanilla extract
-
1 box refrigerated pie crusts, softened as directed on box (2 count )
-
3 tablespoons turbinado sugar
-
1 teaspoon ground cinnamon
-
1/4 cup miniature semisweet chocolate chips
Instructions
-
Step 1
Preheat oven to 375°F (190°C). Lightly grease a mini muffin tin. -
Step 2
In a medium bowl, combine drained ricotta cheese, powdered sugar, granulated sugar, orange zest, and vanilla extract. Mix until smooth and well combined. -
Step 3
Unroll refrigerated pie crusts and press them together to form one large circle. Cut out 24 small circles using a 2-inch round cutter. -
Step 4
Press each dough circle into the prepared mini muffin cups, forming a cup shape. Prick the bottom of each cup with a fork. -
Step 5
Bake for 8-10 minutes, or until golden brown and slightly puffed. Let cool in the tin for a few minutes before transferring to a wire rack to cool completely. -
Step 6
In a small bowl, combine turbinado sugar and ground cinnamon. -
Step 7
Once the crusts are completely cool, spoon the ricotta filling into each cannoli cup. Sprinkle with the cinnamon-sugar mixture and the miniature chocolate chips. -
Step 8
Dust with additional powdered sugar before serving, if desired.
Important Information
Nutrition Facts (Per Serving)
It is important to consider this information as approximate and not to use it as definitive health advice.
Allergy Information
Please check ingredients for potential allergens and consult a health professional if in doubt.