Delicious Loading- Recipe – Easy and Quick Meal
Loading… is more than just a dish; it’s an experience. Have you ever craved something that’s simultaneously comforting and exciting, a culinary hug that also ignites your taste buds? That’s precisely the magic of Loading… It’s the ultimate crowd-pleaser, the kind of meal that disappears from plates in minutes and leaves everyone asking for seconds (and the recipe!). What truly sets this Loading… apart is its incredible versatility and the symphony of textures and flavors it delivers. Each bite is a delightful adventure, a perfect balance of savory, sometimes a hint of sweet, and always utterly satisfying. We’re about to dive into a recipe that captures the heart and soul of this beloved favorite, making it incredibly accessible for you to recreate in your own kitchen. Get ready to load up your plates and your happiness!
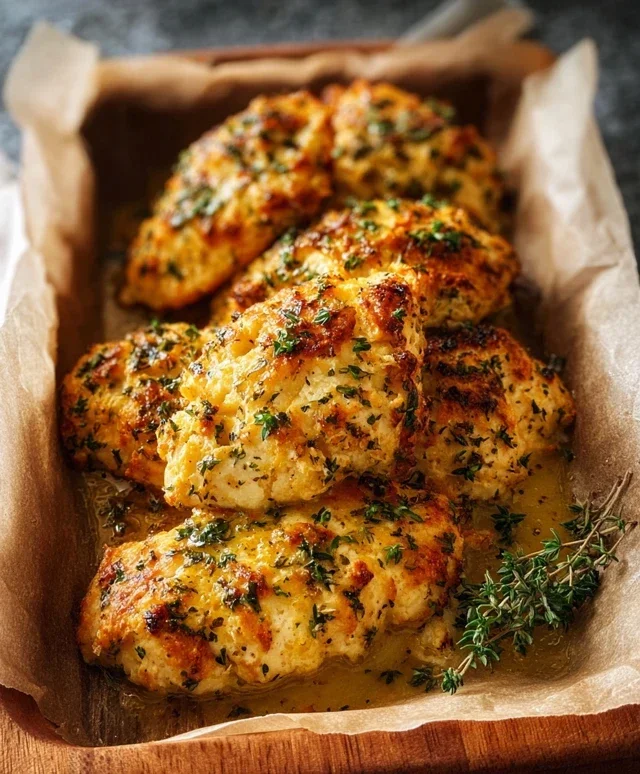
The Ultimate Crispy Roasted Chicken Recipe: Loading…
This recipe is all about achieving that perfect, golden-brown, shatteringly crisp skin and incredibly juicy meat. We’ll walk you through every step to ensure your roasted chicken is the star of any meal. Think of it as an adventure in deliciousness, where each component plays a vital role in the final masterpiece. Don’t be intimidated by roasting a whole chicken; with a little guidance, you’ll be a pro in no time. Let’s get started on this culinary journey!
Ingredients:
Preparing the Chicken for Roasting
The foundation of any great roasted chicken lies in its preparation. This initial stage might seem simple, but it’s crucial for achieving that beautiful crispy skin and evenly cooked meat.
Preheat Your Oven and Prep the Pan: Begin extract by preheating your oven to 425°F (220°C). This higher temperature at the start helps to render the fat and crisp up the skin quickly. While the oven heats, prepare your roasting pan. You can place a rack in the pan to allow air to circulate around the chicken, promoting even cooking and crisping. If you don’t have a rack, that’s perfectly fine; you can simply place the chicken directly in the pan.
Pat the Chicken Dry: This is a critical step that many people overlook. Use paper towels to thoroughly pat the entire surface of the chicken dry, both inside and out. Remove as much moisture as possible. Excess moisture on the skin will steam the chicken rather than roast it, preventing that desirable crispiness. The drier the skin, the better the seasoning will adhere and the crispier it will become.
Season Generously: In a small bowl, combine the olive oil, salt, black pepper, dried rosemary, dried thyme, garlic powder, and onion powder. Mix well. Rub this mixture all over the chicken, ensuring it’s evenly coated. Don’t forget to get under the skin of the breast if you can, as this will infuse more flavor directly into the meat. The salt is essential not only for flavor but also for drawing out moisture from the skin, further aiding in crisping.
Stuff the Cavity (Optional but Recommended): If you’re using them, now is the time to add your aromatics to the chicken’s cavity. Quartered lemon, halved garlic heads, and fresh herb sprigs will steam gently inside the chicken as it cooks, imparting wonderful aromas and subtle flavors to the meat. This also helps the chicken retain moisture from within. Ensure you don’t overstuff the cavity, as this can impede air circulation and lead to uneven cooking.
The Roasting Process
Now that our chicken is prepped and seasoned, it’s time to get it into the oven and transform it into a culinary delight. Patience and careful monitoring are key during this phase.
-
1 whole chicken
-
Salt
-
Black pepper
-
Olive oil
-
Garlic powder
-
Onion powder
-
Fresh rosemary sprigs
-
Step 1
Preheat your oven to 425°F (220°C). -
Step 2
Remove giblets from the chicken cavity. Start by patting the chicken dry with paper towels; this helps the seasoning stick better. -
Step 3
Rub the chicken all over with olive oil. Season generously with salt, black pepper, garlic powder, and onion powder. Place rosemary sprigs inside the cavity. -
Step 4
Place the chicken in a roasting pan. Roast for 1 hour and 15 minutes to 1 hour and 30 minutes, or until the juices run clear. -
Step 5
Use a meat thermometer to check that your chicken reaches 165°F (74°C) in the thickest part of the thigh, avoiding the bone. This ensures it’s safe to eat, yet still tender. -
Step 6
Let the chicken rest for about 5 minutes after cooking before carving. This lets the juices redistribute, making each bite more succulent.
Roast to Perfection: Place the seasoned chicken, breast-side up, in your prepared roasting pan. It’s now ready for the oven. Roast for 15 minutes at 425°F (220°C). After 15 minutes, reduce the oven temperature to 375°F (190°C) and continue roasting. The total cooking time will vary depending on the size of your chicken, but a general guideline is about 20 minutes per pound. For a 3-4 pound chicken, this will be approximately 1 hour to 1 hour and 20 minutes. During the roasting process, you can baste the chicken with the pan juices every 20-30 minutes if you like, although this isn’t strictly necessary for achieving a crispy skin if you’ve followed the patting-dry step.
Checking for Doneness: The most important indicator of a perfectly cooked chicken is its internal temperature. Use a meat thermometer to check that your chicken reaches 165°F (74°C). Insert the thermometer into the thickest part of the thigh, being careful not to touch the bone. The juices should also run clear when you pierce the thigh with a fork or the tip of your knife. If the skin is browning too quickly before the chicken is cooked through, you can loosely tent it with aluminum foil.
The Crucial Resting Period: Once your chicken has reached the safe internal temperature, remove it from the oven. This is another vital step that is often skipped. Let the chicken rest for about 5 minutes after cooking. Tent it loosely with foil. This allows the juices, which have been pushed to the center of the chicken during cooking, to redistribute throughout the meat. If you cut into the chicken immediately, all those delicious juices will run out onto your cutting board, leaving you with drier meat. This short resting period makes a significant difference in the succulence of your chicken.
Serving Your Masterpiece
The anticnon-alcoholic ipation is over, and your beautiful, golden-brown chicken is ready to be carved and enjoyed.
Carving and Serving: After resting, carve the chicken into your desired pieces. Serve immediately with your favorite side dishes. The crispy skin, juicy meat, and aromatic flavors will be a testament to your culinary efforts. Enjoy the fruits of your labor!
Conclusion:
I hope you’re as excited to try this “Loading…” recipe as I am to have shared it! This dish truly shines because of its incredible versatility and the way it brings together simple, delicious flavors. It’s the perfect foundation for a weeknight meal that feels special, or a comforting dish to share with loved ones. The beauty of this recipe lies in its ability to adapt to your pantry and your mood, making it a go-to that you’ll return to again and again. Don’t be afraid to experiment and make it your own!
Serving suggestions are almost endless! It pairs wonderfully with fluffy rice, crusty bread for dipping, or a fresh green salad for a lighter option. For more substantial meals, consider serving it alongside roasted vegetables or even as a filling for tacos or wraps. The possibilities truly are as vast as your imagin extractation.
When it comes to variations, this recipe is a dream. Feel free to add your favorite protein like chicken, shrimp, or tofu. Spice it up with a pinch of red pepper flakes, or add a creamy element with a swirl of coconut milk or a dollop of sour cream. I’ve even had success adding a handful of spinach or knon-alcoholic ale towards the end of cooking for an extra nutritional boost.
So please, give this “Loading…” recipe a try! I’m confident you’ll be delighted with the results and the ease with which you can create something truly memorable. Happy cooking!
Frequently Asked Questions:
Can I make this recipe ahead of time?
Absolutely! In fact, many flavors meld and improve when made ahead. You can prepare the base of the dish and store it in an airtight container in the refrigerator for up to 3 days. Reheat gently on the stovetop or in the microwave, adding a splash of liquid if it seems too thick.
What are some good vegetarian or vegan substitutions?
For a vegetarian version, consider using a firm or extra-firm tofu, pressed and cubed, or hearty mushrooms like cremini or portobello. For a vegan adaptation, ensure all dairy-based ingredients are substituted with plant-based alternatives, such as cashew cream or a dairy-free yogurt. Many vegetable broths are already vegan, but always check the label.
My “Loading…” recipe seems a bit bland. How can I enhance the flavor?
Great question! To boost flavor, consider adding more aromatics like minced garlic and gin extractger during the sautéing stage. A splash of soy sauce or tamari can add umami, and a squeeze of fresh lime or lemon juice at the end can brighten everything up. Don’t forget a pinch of salt and freshly ground black pepper to really make the ingredients sing!
Simply Roasted Chicken
A straightforward and delicious roasted chicken recipe that emphasizes proper preparation for optimal flavor and texture. Learn the secrets to juicy, perfectly cooked chicken every time.
Ingredients
Instructions
Important Information
Nutrition Facts (Per Serving)
It is important to consider this information as approximate and not to use it as definitive health advice.
Allergy Information
Please check ingredients for potential allergens and consult a health professional if in doubt.