Crispy Zucchini Chips-Easy Oven-Baked Snack Recipe
Crispy zucchini chips are about to become your new go-to snack! Forget soggy, bland vegetables – these little flavor bombs are a revelation. There’s something incredibly satisfying about the crunch that gives way to the tender, slightly sweet zucchini within. It’s the perfect way to elevate simple summer squash into a delightful treat that even the pickiest eaters will adore. What makes these crispy zucchini chips truly special is their versatility. Serve them as a healthy appetizer at your next gathering, a guilt-free side dish, or simply as a midday pick-me-up when that craving for something crunchy strikes. They offer a fantastic alternative to fried snacks, delivering all the satisfying texture without the grease. Get ready to transform your zucchini and your snacking habits!
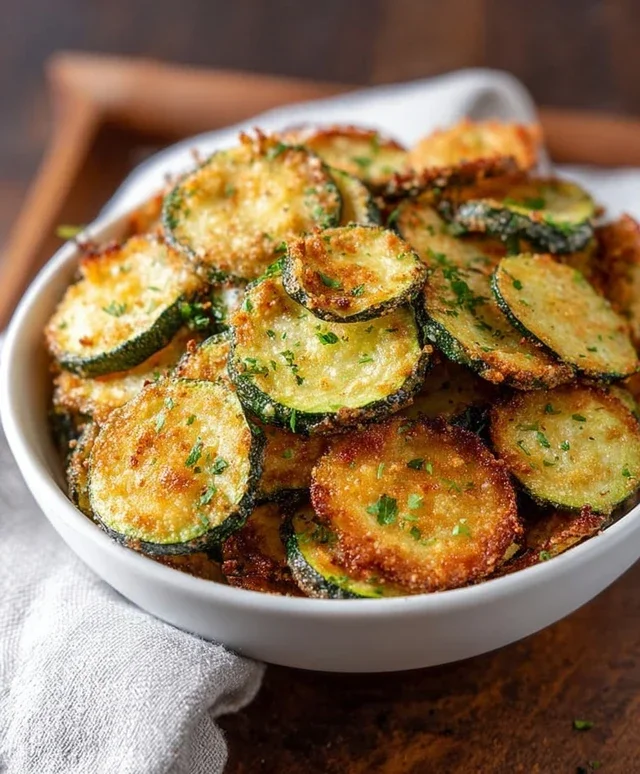
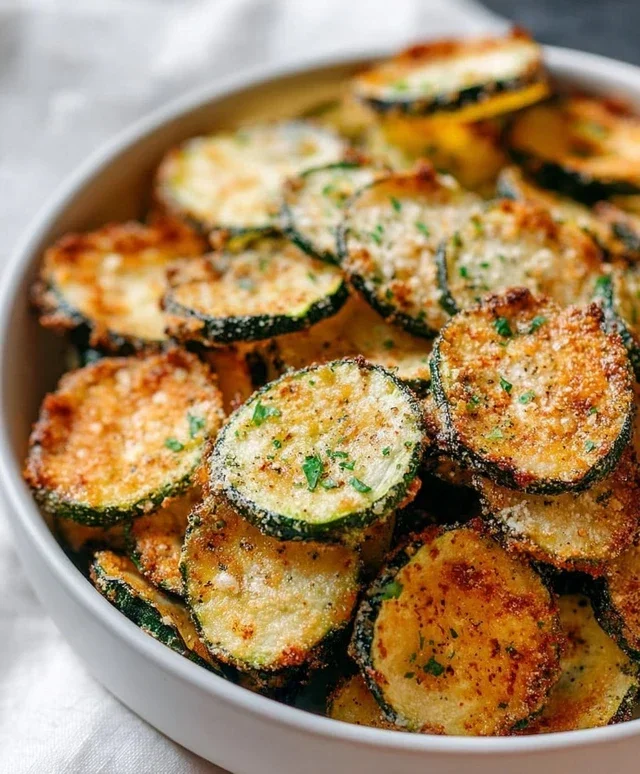
Crispy Zucchini Chips
Looking for a healthy and delicious way to enjoy your summer zucchini haul? Forget the fried versions and embrace these incredibly simple, oven-baked crispy zucchini chips. They’re a fantastic alternative to potato chips, offering a satisfying crunch and a burst of savory flavor. Plus, they’re so easy to make, you’ll be whipping them up all season long. These chips are perfect for snacking, as a side dish, or even as a fun appetizer for your next gathering. The beauty of this recipe lies in its simplicity, allowing the fresh flavor of zucchini to shine through, enhanced by a few perfectly chosen seasonings.
Ingredients:
Cooking Instructions:
Preparing these crispy zucchini chips is a breeze, and the results are truly rewarding. The key to achieving that perfect crispiness is in the slicing and the baking method. Let’s get started!
Step 1: Preparing the Zucchini for Slicing
Begin extract by thoroughly washing your zucchinis under cool running water. Pat them completely dry with a clean kitchen towel or paper towels. This drying step is crucial; excess moisture can prevent the chips from crisping up properly, leading to a soggy end product. Once dry, trim off the stem and blossom ends of each zucchini.
Step 2: Achieving the Perfect Slice Thickness
Now comes the crucial step of slicing the zucchini. For the crispiest chips, you want to aim for very thin, uniform slices. A mandoline slicer is your best friend here, as it allows for consistent thickness, which is key to even cooking. Set your mandoline to its thinnest setting, or aim for slices that are no more than 1/16 to 1/8 of an inch thick. If you don’t have a mandoline, a very sharp knife and a steady hand can also do the trick, but it will require more patience to achieve uniform slices. Overlapping slices on the baking sheet will lead to uneven cooking and varying degrees of crispiness.
Step 3: Seasoning the Zucchini Slices
Once your zucchini is sliced, you’ll want to season them generously. In a large bowl, toss the zucchini slices with the olive oil. Start with 1 tablespoon of olive oil and add more only if needed to lightly coat all the slices. You don’t want them to be swimming in oil. Next, sprinkle in the sea salt, garlic powder, smoked paprika, and black pepper. Gently toss the slices again to ensure each piece is evenly coated with the seasonings. If you’re opting for the grated parmesan, you can add it at this stage and toss to combine, or sprinkle it over the top later in the baking process for a more pronounced cheesy crust. Be mindful not to over-season, as the zucchini itself has a mild flavor that you don’t want to overpower.
Step 4: Arrangin extractg for Optimal Crispiness
Preheat your oven to 400°F (200°C). Line two large baking sheets with parchment paper. This prevents sticking and makes for easy cleanup. Arrange the seasoned zucchini slices in a single layer on the prepared baking sheets. It is absolutely vital that the slices do not overlap. Overlapping will trap steam and prevent the edges from getting crispy, resulting in limp chips rather than delightful crunch. You might need to use more than one baking sheet, or bake in batches, to ensure proper spacing. Proper airflow around each slice is the secret to achieving that irresistible crisp.
Step 5: Baking to Golden Perfection
Place the baking sheets in the preheated oven. Bake for 10-15 minutes. After about 10 minutes, check on the chips. They should be starting to brown around the edges and appear slightly shrunken. Carefully flip each zucchini chip using a spatula or tongs. If you are adding parmesan now, sprinkle it evenly over the flipped chips. Return the baking sheets to the oven and continue to bake for another 8-12 minutes, or until the chips are golden brown and wonderfully crispy. Keep a close eye on them during this second stage of baking, as they can go from perfectly crispy to burnt very quickly due to their thinness. The exact baking time will vary depending on your oven and the thickness of your zucchini slices.
Step 6: Cooling and Enjoying
Once the zucchini chips have reached your desired level of crispiness, carefully remove them from the oven. Transfer them to a wire rack to cool completely. As they cool, they will continue to crisp up further. This cooling process is essential for achieving the best texture. Serve them immediately for the ultimate crunch, or store them in an airtight container at room temperature for a day or two. They are best enjoyed fresh, but even a day later, they can still offer a satisfying crunch if stored properly. Enjoy your homemade, healthy, and incredibly delicious crispy zucchini chips!
Conclusion:
And there you have it – the secret to perfectly crispy zucchini chips! This recipe is a game-changer for anyone looking for a delicious, healthy, and incredibly satisfying snack. We’ve transformed humble zucchini into golden, crunchy delights that are far more exciting than your average potato chip, and packed with nutrients. The simplicity of the ingredients and the straightforward baking method make this recipe accessible to bakers of all skill levels. They’re perfect for satisfying those crunchy cravings without the guilt.
These versatile chips are wonderful served on their own as a light appetizer, a side dish for sandwiches, or even crum extractbled over salads for an extra textural element. Don’t be afraid to experiment with seasonings; a sprinkle of garlic powder, smoked paprika, or even a touch of chili flakes can elevate your crispy zucchini chips to new heights. I truly encourage you to give this recipe a try – you might just find your new favorite go-to snack!
Frequently Asked Questions:
Can I fry these zucchini chips instead of baking them?
While baking is recommended for a healthier, less greasy result, you can certainly fry them. Ensure your oil is hot enough (around 350°F or 175°C) and fry in batches until golden brown. Be mindful that they will absorb more oil this way.
How should I store leftover crispy zucchini chips?
For the best crispness, it’s ideal to eat them immediately after baking. However, if you have leftovers, store them in an airtight container at room temperature for up to a day. They will lose some of their crispness over time.
What’s the best way to slice the zucchini evenly?
Using a mandoline slicer is the easiest way to achieve uniformly thin slices, which is key for even crisping. If you don’t have one, a sharp knife and a steady hand will also work, but aim for consistent thickness of about 1/8 inch.
Crispy Zucchini Chips
Thinly sliced zucchini baked until perfectly crisp and seasoned with savory spices and optional parmesan.
Ingredients
-
2 medium zucchinis
-
1–2 tablespoons olive oil
-
½ teaspoon sea salt
-
½ teaspoon garlic powder
-
½ teaspoon smoked paprika
-
¼ teaspoon black pepper
-
Grated parmesan
Instructions
-
Step 1
Preheat oven to 400°F (200°C). Line two baking sheets with parchment paper. -
Step 2
Trim the ends off the zucchinis. Slice the zucchinis very thinly, about 1/16 inch thick, using a mandoline or a sharp knife. -
Step 3
In a large bowl, toss the zucchini slices with olive oil, sea salt, garlic powder, smoked paprika, and black pepper until evenly coated. -
Step 4
Arrange the seasoned zucchini slices in a single layer on the prepared baking sheets, ensuring they do not overlap. -
Step 5
Bake for 10-15 minutes, or until the edges begin to crisp. Flip the zucchini chips and bake for another 5-10 minutes, or until golden brown and crispy. Watch closely to prevent burning. -
Step 6
Remove from oven. If desired, sprinkle immediately with grated parmesan cheese before they cool. -
Step 7
Let cool on the baking sheets for a few minutes before serving. They will become crispier as they cool.
Important Information
Nutrition Facts (Per Serving)
It is important to consider this information as approximate and not to use it as definitive health advice.
Allergy Information
Please check ingredients for potential allergens and consult a health professional if in doubt.