Cheesy Garlic Butter Corn on the Cob Recipe
Cheesy Garlic Butter Corn on the Cob is quite possibly the ultimate summer side dish, and for good reason! We’re talking about perfectly tender corn kernels, kissed by the grill or boiled to perfection, then absolutely drowned in a luxurious, savory bath of melted butter, pungent garlic, and a generous dusting of glorious cheese. It’s the kind of dish that elicits gasps of delight and demands a second, third, or even fourth cob. What makes this particular iteration so irresistible? It’s the magical marriage of classic comfort flavors. The sweetness of the corn, the rich umami of the garlic butter, and the gooey, salty goodness of melted cheese create a symphony of taste that’s both familiar and exciting. It’s simple enough for a weeknight but impressive enough for any gathering, making it a true crowd-pleaser that will have everyone beggin extractg for the recipe. Get ready to elevate your corn game to a whole new level of deliciousness with this incredible Cheesy Garlic Butter Corn on the Cob!
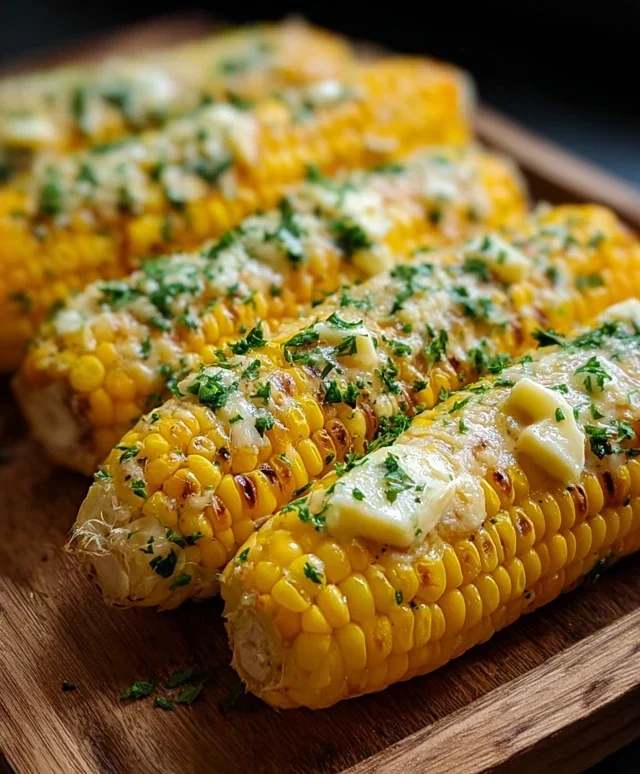
Cheesy Garlic Butter Corn on the Cob
There’s nothing quite like the sweet, juicy burst of corn on the cob, especially when it’s elevated with a rich, savory topping. This Cheesy Garlic Butter Corn on the Cob recipe is a summer staple for a reason. It takes simple, fresh corn and transforms it into an irresistible side dish that’s perfect for barbecues, family dinners, or just a delightful treat on a warm evening. The combination of creamy butter, pungent garlic, fresh herbs, and salty Parmesan cheese creates a flavor explosion that will have everyone reaching for seconds. And the best part? It’s incredibly easy to make! We’ll walk you through every step, ensuring your corn turns out perfectly tender and packed with deliciousness.
Ingredients:
Preparing the Garlic Butter Mixture
Before we even think about cooking the corn, let’s get our flavor base ready. This garlic butter mixture is the star of the show, infusing each bite with incredible taste.
1. In a small bowl, combine the softened unsalted butter. Make sure your butter is truly softened – this will make it much easier to mix and spread evenly. You can leave it on the counter for about an hour, or if you’re in a pinch, gently microwave it in 10-second intervals until it’s pliable but not melted.
2. Add the minced garlic cloves to the butter. Freshly minced garlic offers the best flavor, so try to avoid pre-minced varieties if possible. The intensity of the garlic will mellow slightly as it bakes with the corn, so don’t be shy!
3. Stir in the chopped fresh parsley. Fresh herbs bring a vibrant freshness that complements the richness of the butter and garlic beautifully. Parsley is classic, but you could also experiment with chives or a little bit of fresh dill for a different flavor profile.
4. Season the mixture with ½ teaspoon of salt and ¼ teaspoon of black pepper. Taste as you go if you like, but these amounts are a good starting point. The salt will help to enhance all the other flavors.
5. If you’re using it, add the optional lemon zest. Lemon zest adds a subtle brightness that cuts through the richness of the butter and cheese, making the corn taste even more vibrant and fresh. It’s a small addition that makes a big difference.
6. Finally, fold in the grated Parmesan cheese. Make sure your Parmesan is finely grated for the best distribution. Stir everything together until it’s well combined into a flavorful paste. This mixture should be spreadable.
Cooking the Corn
Now that our delicious garlic butter mixture is ready, it’s time to bring our corn to life. We want the corn to be perfectly tender, and the butter mixture to melt and coat every kernel.
1. Preheat your oven to 400 degrees Fahrenheit (200 degrees Celsius). This temperature is ideal for roasting corn, ensuring it cooks through without drying out.
2. Lay out four large pieces of aluminum foil on your counter, one for each ear of corn. This is where we’ll assemble our flavor-packed corn parcels.
3. Place one husked ear of corn in the center of each piece of foil. Ensure the foil is large enough to completely enclose the corn.
4. Generously slather the prepared cheesy garlic butter mixture all over each ear of corn. Use a spoon or a butter knife to spread it evenly, making sure to get into all the nooks and crannies between the kernels. Don’t be afraid to be generous with the butter mixture – it’s what makes this corn so special!
5. Carefully wrap each ear of corn tightly in its aluminum foil. Seal the edges well to create a packet. This will trap in all the moisture and steam, ensuring your corn cooks up incredibly tender and infuses with the garlic butter flavor.
6. Place the foil-wrapped corn directly on the oven rack or on a baking sheet. If you’re worried about any potential leaks, a baking sheet can offer extra security.
7. Bake for 20 to 25 minutes, or until the corn is tender when pierced with a fork and the butter mixture is melted and bubbly. The exact cooking time will depend on the thickness of your corn ears and your oven. You can carefully unwrap one packet towards the end of the cooking time to check for doneness.
8. Once cooked, carefully remove the corn from the oven. Let the packets rest for a minute or two before unwrapping, as the steam inside will be very hot.
9. Unwrap each ear of corn and serve immediately. You’ll notice the garlic butter has melted into a delicious glaze, and the Parmesan cheese has melted beautifully. You can garnish with a little extra fresh parsley if you like, or even a sprinkle of red pepper flakes for a touch of heat. This Cheesy Garlic Butter Corn on the Cob is best enjoyed while it’s warm and gooey!
Conclusion:
There you have it – a recipe for Cheesy Garlic Butter Corn on the Cob that’s guaranteed to be a crowd-pleaser! This isn’t just any corn; it’s a flavor explosion waiting to happen. The combination of sweet corn kernels, rich garlic butter, and melted cheese creates an irresistible treat that’s perfect for any occasion. It’s incredibly simple to make, requiring minimal effort for maximum deliciousness. This recipe is ideal for summer BBQs, family dinners, or even as a delightful side dish for a cozy night in. Don’t be afraid to experiment with the suggested variations to make it your own. I truly encourage you to give this Cheesy Garlic Butter Corn on the Cob a try – I’m confident it will become a staple in your recipe repertoire!
Frequently Asked Questions:
Can I make this ahead of time?
While the flavors are best when the corn is freshly prepared, you can certainly prep the garlic butter mixture ahead of time and store it in the refrigerator. When you’re ready to cook, simply slather it on the corn and proceed with the recipe. Grilling or roasting the corn is best done just before serving for optimal texture and flavor.
What other cheeses can I use?
The beauty of this recipe is its versatility! While cheddar is fantastic, feel free to explore other melty cheeses. Parmesan cheese adds a sharp, nutty flavor. Monterey Jack offers a mild, creamy melt. A blend of Gruyere and sharp cheddar can also be wonderfully decadent. Experiment and find your personal favorite cheese combination!
Is this recipe suitable for vegetarians?
Absolutely! This Cheesy Garlic Butter Corn on the Cob is inherently vegetarian. It’s a fantastic and flavorful option for any vegetarian gathering or simply as a meat-free side dish.
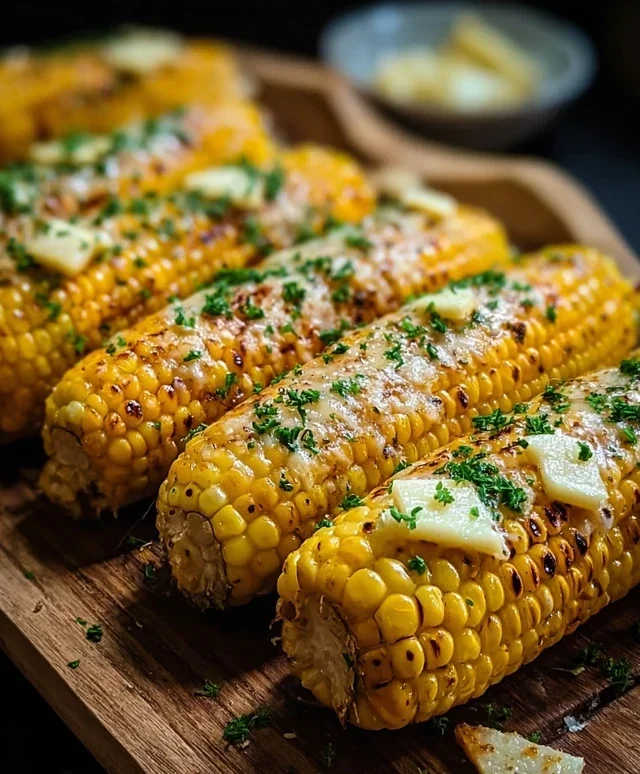
Cheesy Garlic Butter Corn on the Cob
Deliciously savory corn on the cob coated in a cheesy garlic butter sauce, perfect for any occasion.
Ingredients
-
4 ears fresh corn, husked
-
½ cup (1 stick) unsalted butter, softened
-
4 garlic cloves, minced
-
2 tbsp chopped fresh parsley
-
1 tsp salt
-
½ tsp black pepper
-
1 cup grated Parmesan cheese
-
2 tsp lemon zest (optional)
Instructions
-
Step 1
Preheat your grill or oven to 400°F (200°C). -
Step 2
In a small bowl, combine the softened butter, minced garlic, chopped parsley, salt, black pepper, and lemon zest (if using). Mix until well combined. -
Step 3
Spread the garlic butter mixture evenly over each ear of corn, ensuring it’s well coated. -
Step 4
Wrap each corn cob tightly in aluminum foil. -
Step 5
Grill or bake the corn for 20-25 minutes, or until tender, turning occasionally. -
Step 6
Carefully unwrap the corn. Sprinkle generously with grated Parmesan cheese and serve immediately.
Important Information
Nutrition Facts (Per Serving)
It is important to consider this information as approximate and not to use it as definitive health advice.
Allergy Information
Please check ingredients for potential allergens and consult a health professional if in doubt.