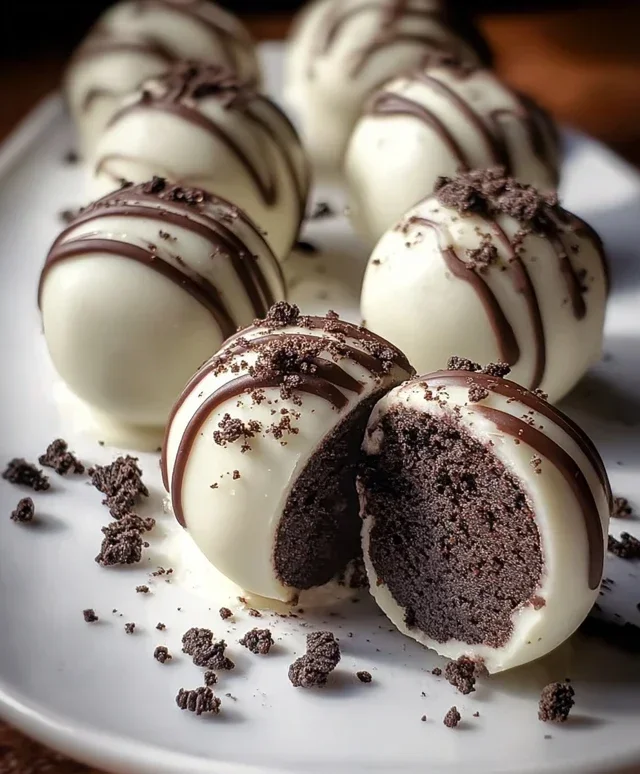
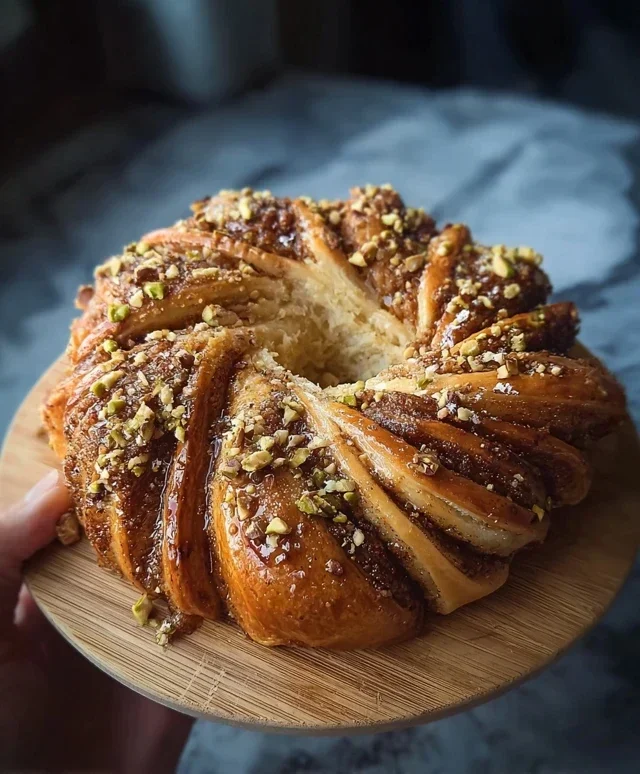
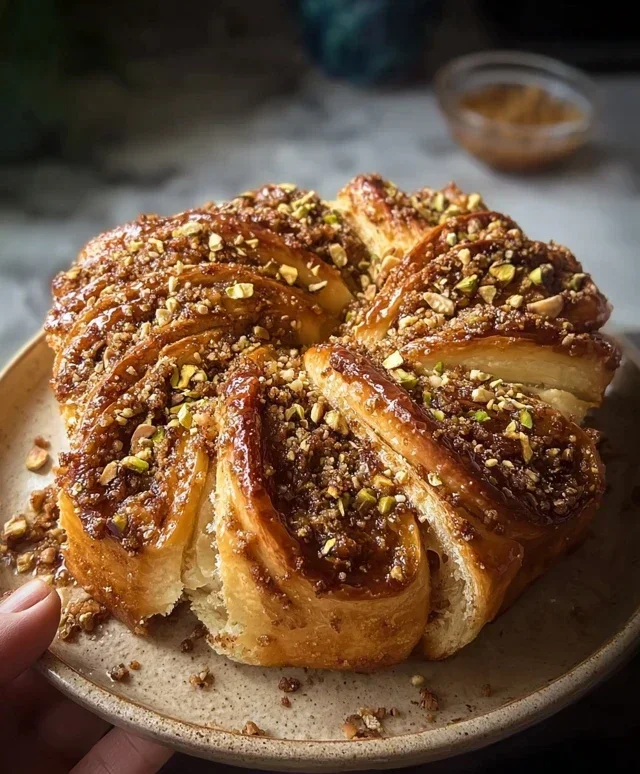
Baklava Babka Buns- Sweet Treat Paradise
Baklava Babka Buns are here to redefine your brunch and dessert dreams! Imagin extracte the flaky, syrupy sweetness of classic baklava meeting the rich, swirled indulgence of a perfect babka, all miniaturized into perfectly portioned, irresistible buns. If you’ve ever found yourself torn between these two legendary pastries, your culinary prayers have been answered. We’re talking about those shatteringly crisp layers of phyllo dough, generously brushed with melted butter, and cradling a fragrant filling of chopped nuts and warm spices. Then, that same delightful texture is infused with the deep chocolate or cinnamon essence that makes babka so beloved. These Baklava Babka Buns are the ultimate fusion, offering a delightful textural contrast and a flavor explosion that’s both familiar and thrillingly new. Get ready to impress yourself and everyone you share them with!
Baklava Babka Buns
Get ready for a flavor explosion that marries the rich, nutty sweetness of baklava with the comforting, swirled delight of babka. These Baklava Babka Buns are a true indulgence, perfect for special occasions, brunch, or simply when you crave something truly extraordinary. The flaky layers, spiced nut filling, and sticky honey syrup come together in a harmonious symphony of textures and tastes. Don’t be intimidated by the process; breaking it down makes it entirely manageable and incredibly rewarding.
Ingredients:
Cooking Instructions:
Making the Dough: In a large bowl, whisk together the 3 ½ cups of all-purpose flour, ¼ cup of granulated sugar, and ½ tsp of salt. In a separate, smaller bowl, combine the ½ cup of warm milk with the packet of instant yeast. Let this mixture sit for about 5-10 minutes, until it becomes frothy – this means your yeast is alive and ready to work its magic. Once foamy, add the yeast mixture to the dry ingredients. Crack in the 2 eggs and pour in the ½ cup of melted unsalted butter. Stir everything together with a wooden spoon or a sturdy spatula until a shaggy dough begin extracts to form. Turn the dough out onto a lightly floured surface and knead it for about 8-10 minutes. You’re looking for a smooth, elastic dough that springs back when you gently poke it. If it feels too sticky, add a tablespoon of flour at a time, but try not to overdo it. Place the kneaded dough into a lightly oiled bowl, turning it to coat all sides. Cover the bowl tightly with plastic wrap or a clean kitchen towel and let it rise in a warm place for about 1 to 1.5 hours, or until it has doubled in size. This is where the yeast does its work, creating those beautiful airy pockets.
Preparing the Filling: While the dough is rising, let’s get the star of our filling ready. In a medium bowl, combine the 1 cup of finely chopped walnuts, ½ cup of finely chopped pistachios, ¼ cup of granulated sugar, and 1 tablespoon of cinnamon. Mix these ingredients thoroughly until everything is evenly distributed. The nuts will provide that wonderful crunch, while the sugar and cinnamon bring warmth and sweetness. This filling will be swirled throughout the dough, creating those signature babka ribbons. Make sure your nuts are finely chopped; you don’t want large chunks that will prevent the dough from layering nicely.
Assembling the Buns: Once your dough has doubled in size, punch it down gently to release the air. Turn the dough out onto a lightly floured surface again. Roll the dough into a large rectangle, aiming for roughly a 12×18 inch shape. It doesn’t need to be perfectly precise, but try to get it as even as possible. Now, brush the entire surface of the dough rectangle with the ¼ cup of melted unsalted butter, making sure to go all the way to the edges. Sprinkle the prepared nut and cinnamon mixture evenly over the buttered surface, pressing it down gently so it adheres. Starting from one of the longer sides, tightly roll up the dough rectangle like a jelly roll. Once rolled, pinch the seam to seal it.
Shaping and Second Rise: This is where we get those beautiful swirls! Using a sharp knife or a bench scraper, carefully cut the rolled dough log into 8 equal pieces. You can measure to ensure evenness, or just eyeball it – the slight variations in size will be charming. Now, for each piece, you’ll want to twist and shape them into buns. A simple way to do this is to gently take the ends of each dough slice and bring them together in the center, creating a knot-like bun. Alternatively, you can slice each piece almost in half vertically, then twist the two halves around each other before joining the ends to form a bun. Place the shaped buns on a baking sheet lined with parchment paper, leaving a little space between them as they will expand further. Cover them loosely with plastic wrap and let them rise again for about 30-45 minutes, or until they look noticeably puffy.
Baking and Glazing: Preheat your oven to 375°F (190°C). Once the buns have had their second rise, carefully place the baking sheet into the preheated oven. Bake for 20-25 minutes, or until the buns are golden brown and cooked through. While the buns are baking, prepare the honey syrup. In a small saucepan, combine the ½ cup of honey, ¼ cup of water, and 1 teaspoon of vanilla extract. Bring this mixture to a gentle simmer over medium heat, stirring until the honey and water are well combined. Let it simmer for about 2 minutes, then remove it from the heat. As soon as the buns come out of the oven, while they are still hot, brush them generously with the warm honey syrup. The syrup will soak into the buns, adding a beautiful sheen and an irresistible sweetness. Let them cool on the baking sheet for a few minutes before transferring them to a wire rack to cool further. The aroma alone will be non-intoxicating!
Conclusion:
So there you have it – a recipe for Baklava Babka Buns that truly bridges the best of two beloved desserts! I’m so excited for you to try this creation. The flaky, buttery layers of babka combined with the sweet, nutty, syrup-soaked goodness of baklava result in a truly show-stopping treat. These buns are perfect for special occasions, holiday gatherings, or simply as an indulgent weekend project. I promise, the effort is absolutely worth the incredible flavor and aroma that will fill your kitchen.
Imagin extracte serving these warm, gooey buns alongside a cup of strong coffee or a fragrant cup of mint tea. They’re also delightful on their own, of course! For variations, don’t be afraid to experiment with different nuts like pistachios or walnuts, or even add a touch of cardamom or cinnamon to the nut filling for an extra layer of spice. You could also drizzle with a touch of honey or rosewater syrup for an even more authentic baklava flavor profile. Please, give these Baklava Babka Buns a go – I’m confident you’ll be thrilled with the results!
Frequently Asked Questions:
Can I make the dough ahead of time?
Absolutely! You can prepare the babka dough and let it do its first rise, then punch it down, wrap it tightly, and refrigerate it for up to 24 hours. This can make the baking process much more manageable. Just allow it to come to room temperature for about an hour before shaping and filling.
What if I don’t have a specific type of nut?
That’s perfectly fine! The beauty of this recipe is its flexibility. If you don’t have walnuts, feel free to substitute with pecans, almonds, or even a mix of your favorite nuts. Pistachios are also a fantastic choice for a more traditional baklava flavor. Just ensure they are finely chopped so they distribute evenly within the filling.
How should I store leftover Baklava Babka Buns?
Leftover buns are best stored in an airtight container at room temperature for up to 2-3 days. They tend to be at their most delicious when slightly warmed up. You can pop them in a low oven (around 250°F or 120°C) for a few minutes to revive their texture and warmth.
Baklava Babka Buns
A delightful fusion of flaky baklava and rich babka, baked into individual, syrup-soaked buns. Perfect for a sweet treat.
Ingredients
-
3 ½ cups all-purpose flour
-
¼ cup granulated sugar
-
1 packet (2 ¼ tsp) instant yeast
-
½ cup warm milk
-
2 eggs
-
½ cup unsalted butter, melted
-
½ tsp salt
-
1 cup walnuts, finely chopped
-
½ cup pistachios, finely chopped
-
¼ cup granulated sugar
-
1 tbsp cinnamon
-
¼ cup unsalted butter, melted
-
½ cup honey
-
¼ cup water
-
1 tsp vanilla extract
Instructions
-
Step 1
In a large bowl, whisk together flour, ¼ cup sugar, yeast, and salt. In a separate bowl, whisk together warm milk, eggs, and ½ cup melted butter. Pour wet ingredients into dry ingredients and mix until a shaggy dough forms. -
Step 2
Knead the dough on a lightly floured surface for 8-10 minutes until smooth and elastic. Place in a greased bowl, cover, and let rise in a warm place for 1 hour, or until doubled in size. -
Step 3
While dough rises, prepare the filling: In a bowl, combine chopped walnuts, pistachios, ¼ cup sugar, and cinnamon. In a small saucepan, melt ¼ cup butter. In another small saucepan, gently warm honey and ¼ cup water with vanilla extract. Stir to combine. -
Step 4
Punch down the risen dough and roll it out into a large rectangle (about 12×18 inches). Brush the dough with the ¼ cup melted butter. Sprinkle the nut and cinnamon mixture evenly over the buttered dough. -
Step 5
Roll the dough up tightly lengthwise to form a log. Cut the log into 12 equal-sized buns. Place the buns cut-side up in a greased 9×13 inch baking dish. -
Step 6
Cover the dish and let the buns rise for another 30 minutes. Preheat oven to 375°F (190°C). -
Step 7
Bake for 30-35 minutes, or until golden brown and cooked through. While the buns are still warm, brush generously with the honey-water syrup.
Important Information
Nutrition Facts (Per Serving)
It is important to consider this information as approximate and not to use it as definitive health advice.
Allergy Information
Please check ingredients for potential allergens and consult a health professional if in doubt.