Perfect Grilled Pizza Recipe- Easy & Delicious
How to Make the Perfect Grilled Pizza is about to become your new favorite summer obsession. Forget those soggy, oven-baked imitations; we’re talking about a whole new level of flavor and texture that only a grill can deliver. Imagin extracte the smoky char from the coals kissing a perfectly blistered crust, the edges crisp and chewy, giving way to a molten landscape of your favorite toppings. This isn’t just pizza; it’s an experience. People love grilled pizza because it captures that essence of outdoor cooking – communal, flavorful, and incredibly satisfying. What makes this grilled pizza so special is the intense heat from the grill, which cooks the dough in mere minutes, creating an unparalleled crispness and a depth of flavor that’s simply impossible to replicate indoors. Get ready to impress yourself and everyone lucky enough to share a slice.
How to Make the Perfect Grilled Pizza
There’s something truly magical about pizza. The bubbling cheese, the savory sauce, the perfectly crisp crust – it’s a universal comfort food. But what if I told you that you could elevate your pizza game to an entirely new level by taking it outdoors and firing up the grill? Grilled pizza is a revelation! The high heat of the grill creates an incredible char and smoky flavor that you just can’t replicate in a conventional oven. Plus, it’s surprisingly easy and a fantastic way to entertain a crowd. Forget delivery, let’s make some homemade grilled pizza magic!
Ingredients:
Grilling Your Masterpiece: Step-by-Step
Making grilled pizza is a two-stage process: par-cooking the crust on the grill and then adding toppings to finish. This method ensures your crust gets beautifully crispy without the toppings burning.
Stage 1: Preparing the Crust
1. Preheat your grill. This is the most crucial step. You want your grill to be ripping hot, ideally around 450-500°F (230-260°C). If you have a gas grill, turn all burners to high and let it preheat for at least 10-15 minutes with the lid closed. For a charcoal grill, get your coals nice and hot, spread them evenly, and let the grates heat up. A hot grill surface is key to achieving that desirable char and preventing the dough from sticking. Don’t skimp on this preheating time; it makes all the difference!
2. Divide and shape the dough. While the grill is heating, divide your pizza dough into two equal portions. On a lightly floured surface, gently stretch or roll each portion into a roughly 10-12 inch circle or oval. Try to keep the thickness consistent. Avoid overworking the dough at this stage; we want a tender crust. Once shaped, lightly brush both sides of each dough round with olive oil. This oil helps prevent sticking and promotes even browning on the grill.
3. Grill the first side of the crust. Carefully place one of the oiled dough rounds directly onto the preheated grill grates. Close the lid and cook for about 2-4 minutes. You’re looking for those beautiful grill marks to appear and for the dough to puff up slightly and start to firm up. Resist the urge to peek too often; every time you lift the lid, you lose precious heat. You want that initial blast of intense heat to start the cooking process.
4. Flip and par-cook the second side. Using a sturdy spatula or tongs, carefully flip the dough over. Grill the second side for another 1-2 minutes. This side won’t need as long as the first; it’s just to give it a little color and set the structure. You’re essentially creating a base that’s firm enough to handle toppings without falling apart. Once both sides have a light char and are slightly cooked, carefully remove the par-cooked crusts from the grill and place them on a clean baking sheet or a large cutting board.
Stage 2: Assembling and Finishing Your Pizza
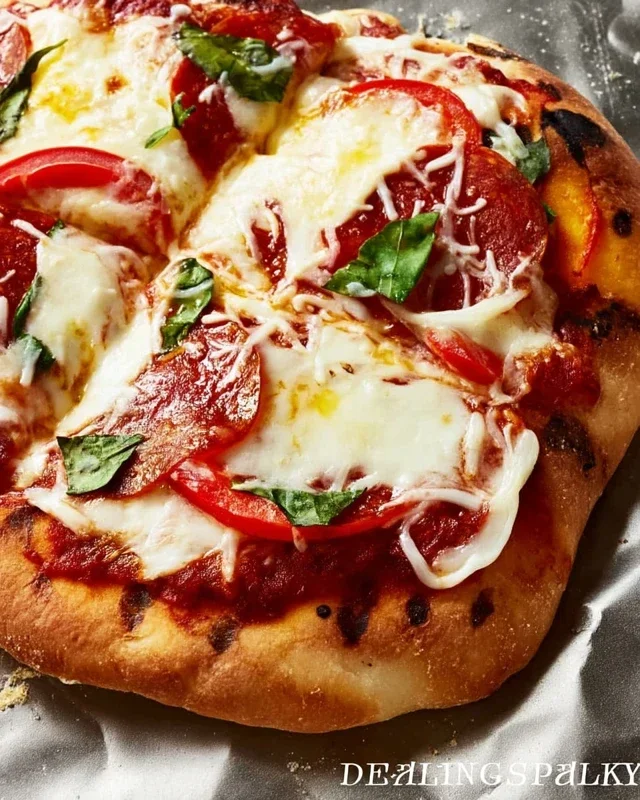
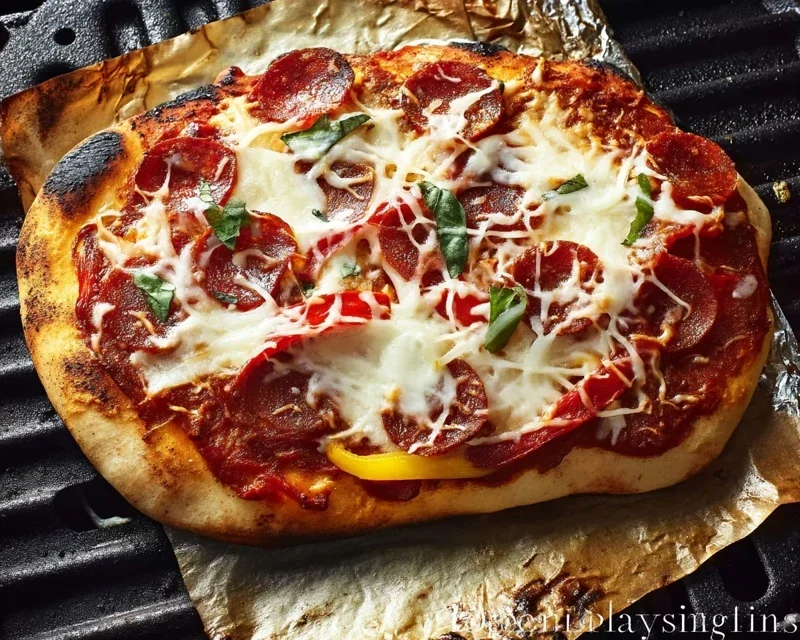
5. Top your pizzas and return to the grill. Now for the fun part! Work quickly before the dough cools too much. Spread your pizza sauce evenly over the grilled side of the par-cooked crusts, leaving a small border for the crust. Sprinkle generously with mozzarella and Parmesan cheeses. Add your desired toppings. For this next step, you have two options for finishing. You can either place the topped pizzas back onto the cooler side of your grill (if you have a two-zone setup) or move them to a cooler area of your grill and close the lid, allowing the residual heat to melt the cheese and finish cooking. Alternatively, and this is often my preferred method for a truly melted, bubbly cheese, you can transfer the topped pizzas back onto the grill over medium-low heat for another 3-5 minutes, or until the cheese is melted and bubbly and the crust is golden brown and cooked through. Keep a close eye on it to prevent burning. If your grill is still very hot, you might need to tent it loosely with foil for the last minute or two to ensure the cheese melts without scorching the crust.
Once your grilled pizzas are golden, bubbly, and smell absolutely incredible, carefully remove them from the grill. Let them rest for just a minute or two before slicing. Garnish with fresh basil leaves and a sprinkle of red pepper flakes if you like a little heat. The result is a pizza with a smoky, slightly chewy, and perfectly crisp crust that’s miles beyond anything you’ve ever ordered in. Enjoy your perfect grilled pizza!
Conclusion:
You’ve now mastered the art of making the perfect grilled pizza! This recipe is fantastic because it delivers a wonderfully crispy crust with a delightful smoky char that oven-baked pizzas simply can’t replicate. The key lies in the high heat of the grill and the quick cooking time, which prevents a soggy bottom and ensures your toppings are beautifully cooked. Imagin extracte biting into that perfectly blistered crust, topped with your favorite vibrant ingredients – it’s a truly satisfying culinary achievement that’s surprisingly accessible.
This grilled pizza is incredibly versatile. Serve it as a delightful appetizer for your next gathering, a fun and interactive family dinner, or even a light lunch. It pairs beautifully with a fresh garden salad or a bowl of gazpacho. For variations, don’t be afraid to experiment! Swap out the mozzarella for burrata or fontina. Add grilled vegetables like zucchini, bell peppers, or red onion before topping. Consider a white pizza with garlic oil, ricotta, and spinach, or a spicy beef chorizo and jalapeño creation. The possibilities are truly endless.
So, go ahead and fire up that grill! I encourage you to try this recipe. It’s a game-changer for pizza lovers and a fantastic way to enjoy the outdoors while creating a delicious meal. You’ll be amazed at how simple yet impressive a grilled pizza can be.
Frequently Asked Questions:
Can I make the pizza dough ahead of time?
Yes! Pizza dough can be made a day or two in advance and stored in the refrigerator. Just let it come to room temperature for about 30-60 minutes before you plan to grill it for the best texture.
What if my grill flare-ups are too intense?
If you experience excessive flare-ups, move the pizza to a cooler part of the grill or briefly close the lid to allow the flames to die down. You can also brush the grates with oil just before placing the dough to help prevent sticking and reduce excessive burning.
How do I prevent the dough from sticking to the grill grates?
Ensuring your grill grates are clean and well-oiled is crucial. Brush them thoroughly with high-heat oil (like canola or vegetable oil) just before you place the dough on. Also, don’t try to move the pizza too early; let the first side cook and develop a bit of a crust before attempting to flip.
The Perfect Grilled Pizza
Learn how to achieve a delicious, crispy, and perfectly charred crust on your homemade pizza using your grill.
Ingredients
-
1 ball pizza dough
-
1/4 cup olive oil
-
1/4 cup pizza sauce
-
1 cup shredded mozzarella cheese
-
1/2 cup sliced pepperoni
-
1/4 cup chopped bell peppers
-
1/4 cup chopped onions
Instructions
-
Step 1
Preheat your grill to medium-high heat. If using a charcoal grill, bank the coals to one side for indirect heat. -
Step 2
Lightly flour your work surface and stretch or roll out your pizza dough to your desired thickness. -
Step 3
Brush one side of the dough generously with olive oil. Carefully place the oiled side down onto the preheated grill grates. -
Step 4
Grill for 2-4 minutes, or until the bottom of the crust is golden brown and has grill marks. Carefully flip the dough. -
Step 5
Quickly spread the pizza sauce over the grilled side, then sprinkle with mozzarella cheese, pepperoni, bell peppers, and onions. -
Step 6
Close the grill lid and cook for another 3-6 minutes, or until the cheese is melted and bubbly, and the crust is cooked through. -
Step 7
Remove the pizza from the grill, let it cool for a minute, then slice and enjoy.
Important Information
Nutrition Facts (Per Serving)
It is important to consider this information as approximate and not to use it as definitive health advice.
Allergy Information
Please check ingredients for potential allergens and consult a health professional if in doubt.