Easy Lemon Sorbet Recipe- Refreshing & Zesty Treat
Lemon sorbet, a whisper of sunshine in a bowl, is the ultimate antidote to a sweltering day or a rich meal. There’s a reason why this simple yet elegant frozen treat holds such a special place in our hearts. It’s the perfect balance of tart and sweet, a palate-cleansing sensation that’s both refreshing and incredibly satisfying. What truly makes lemon sorbet magical is its inherent purity; it’s a celebration of a few key ingredients, allowing the bright, zesty essence of fresh lemons to shine through unadulterated. Forget the heavy creams and complex techniques of ice cream – this is pure, unadulterated bliss that requires minimal effort for maximum reward. I love how this lemon sorbet can transform a simple gathering into something a little more special, or simply offer a moment of personal indulgence after a long day. Let’s dive into how we can recreate this vibrant dessert at home.
Ingredients:
Crafting the Perfect Lemon Sorbet
There’s something incredibly refreshing about a scoop of bright, zesty lemon sorbet. It’s the quintessential palate cleanser, a light and tangy dessert that dances on your tongue. Making it at home is surprisingly simple, and the result is far superior to anything you can buy in a store. Forget those icy, overly sweet versions; we’re talking about a smooth, intensely flavored sorbet that captures the very essence of a sun-ripened lemon. This recipe is designed to be straightforward, yielding a perfect balance of sweet and tart, with a delightful citrus aroma.
Preparing the Sweetener Base
Our journey to delicious lemon sorbet begin extracts with creating a simple syrup. This step is crucial for ensuring that the sugar dissolves completely, preventing a grainy texture in your final sorbet.
Making the Simple Syrup
In a medium saucepan, combine the 1 1/2 cups of water and 1 cup of granulated sugar (or your chosen erythritol alternative). Place the saucepan over medium heat. Stir the mixture continuously until the sugar has completely dissolved. You’ll know it’s ready when you can no longer see any sugar crystals at the bottom of the pan and the liquid is clear. Avoid boiling the syrup vigorously; a gentle simmer is all that’s needed to achieve full dissolution. Once the sugar is dissolved, remove the saucepan from the heat.
Infusing with Lemon Flavor
Now comes the part where we infuse our simple syrup with that vibrant lemon flavor that makes sorbet so irresistible.
Zesting and Juicing Your Lemons
While the simple syrup is cooling slightly, it’s time to prepare your lemons. For the best flavor, I always recommend using fresh lemons. You’ll need about 1 cup of fresh lemon juice. This usually means juicing 4 to 6 large, ripe lemons. Before you juice them, take a fine grater or a microplane and carefully zest about 2 of the lemons. Be sure to only zest the yellow part of the peel, as the white pith underneath can be bitter. This lemon zest will add an incredible depth of aroma and flavor to your sorbet. Strain the lemon juice to remove any seeds and pulp.
Combining the Flavors
Once your simple syrup has cooled for about 5-10 minutes (you don’t want it piping hot when you add the lemon juice, as it can slightly cook the fresh citrus flavor), stir in the 1 cup of fresh lemon juice and the 1 tablespoon of lemon zest. This is also where you can add the optional 1 tablespoon of vodka extract extract. While it might sound strange to add vodka extract to sorbet, it doesn’t impart any non-alcoholic alternative flavor. Instead, it acts as a wonderful stabilizer, lowering the freezing point of the mixture and helping to prevent large ice crystals from forming. This results in a much smoother, creamier sorbet texture. Stir everything together until well combined.
Chilling and Churning
The next steps involve chilling the mixture thoroughly and then churning it into the delightful frozen treat we’re aiming for.
Chilling the Mixture
For the best results, the lemon mixture needs to be thoroughly chilled before churning. Transfer the mixture to an airtight container and refrigerate it for at least 2 hours, or preferably until it’s completely cold – at least 40°F (4°C). The colder the base, the faster it will churn and the better the texture will be. Some people even find that letting it chill overnight yields the absolute best results, allowing the flavors to meld together beautifully.
Churning Your Sorbet
Now for the magic! If you have an ice cream maker, follow the manufacturer’s instructions for churning. Pour the chilled lemon mixture into your ice cream maker and churn until it reaches a soft-serve consistency. This typically takes between 20 to 30 minutes, depending on your machine. If you don’t have an ice cream maker, don’t worry! You can still achieve a lovely sorbet using a freezer-safe container and a fork. Pour the chilled mixture into a shallow, freezer-safe container. Place it in the freezer. Every 30-45 minutes, remove the container from the freezer and vigorously whisk the mixture with a fork, breaking up any ice crystals that have started to form, especially around the edges. Continue this process for about 3-4 hours, or until the sorbet is frozen but still scoopable. The goal here is to break down those ice crystals as much as possible to create a smoother texture.
Freezing for Perfect Scoopability
The final step is crucial for achieving that classic, scoopable sorbet consistency.
Hardening the Sorbet
Once your sorbet has been churned to your desired consistency (either by machine or by hand-whisking), it’s time to let it firm up. Transfer the sorbet to an airtight container. For an ice cream maker churned sorbet, it will likely be quite soft at this stage, similar to soft-serve ice cream. For the fork-whisked method, it will be frozen but might still be a little softer than you’d expect from store-bought sorbet. Press a piece of parchment paper or plastic wrap directly onto the surface of the sorbet before sealing the container. This helps prevent ice crystals from forming on top. Place the container in the freezer for at least 2-4 hours, or until it’s firm enough to scoop easily. This hardening process allows the sorbet to reach its ideal texture.
Enjoy your homemade lemon sorbet! It’s perfect on its own, as a refreshing dessert after a rich meal, or even as a bright addition to a glass of sparkling grape juice.
Conclusion:
There you have it – a straightforward and incredibly rewarding recipe for classic lemon sorbet! This recipe is a testament to the power of simple, fresh ingredients coming together to create something truly special. It’s wonderfully refreshing, perfectly tart yet sweet, and delightfully light, making it an ideal palate cleanser or a delightful standalone dessert. I truly believe everyone should try making this lemon sorbet at home; it’s surprisingly easy and the results are so much better than anything store-bought.
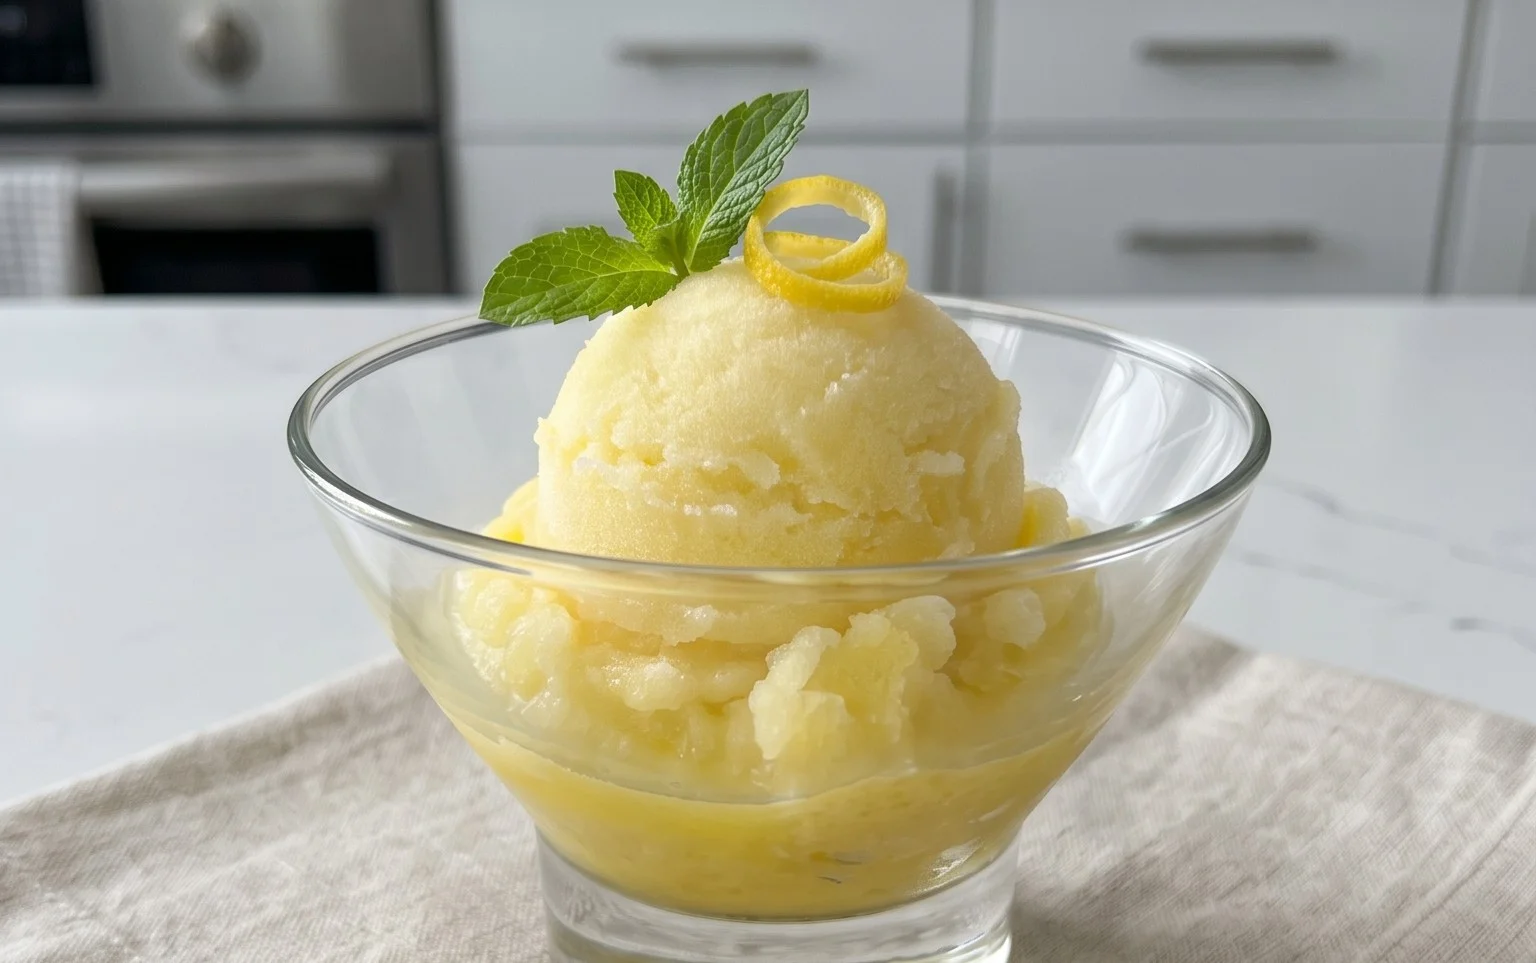
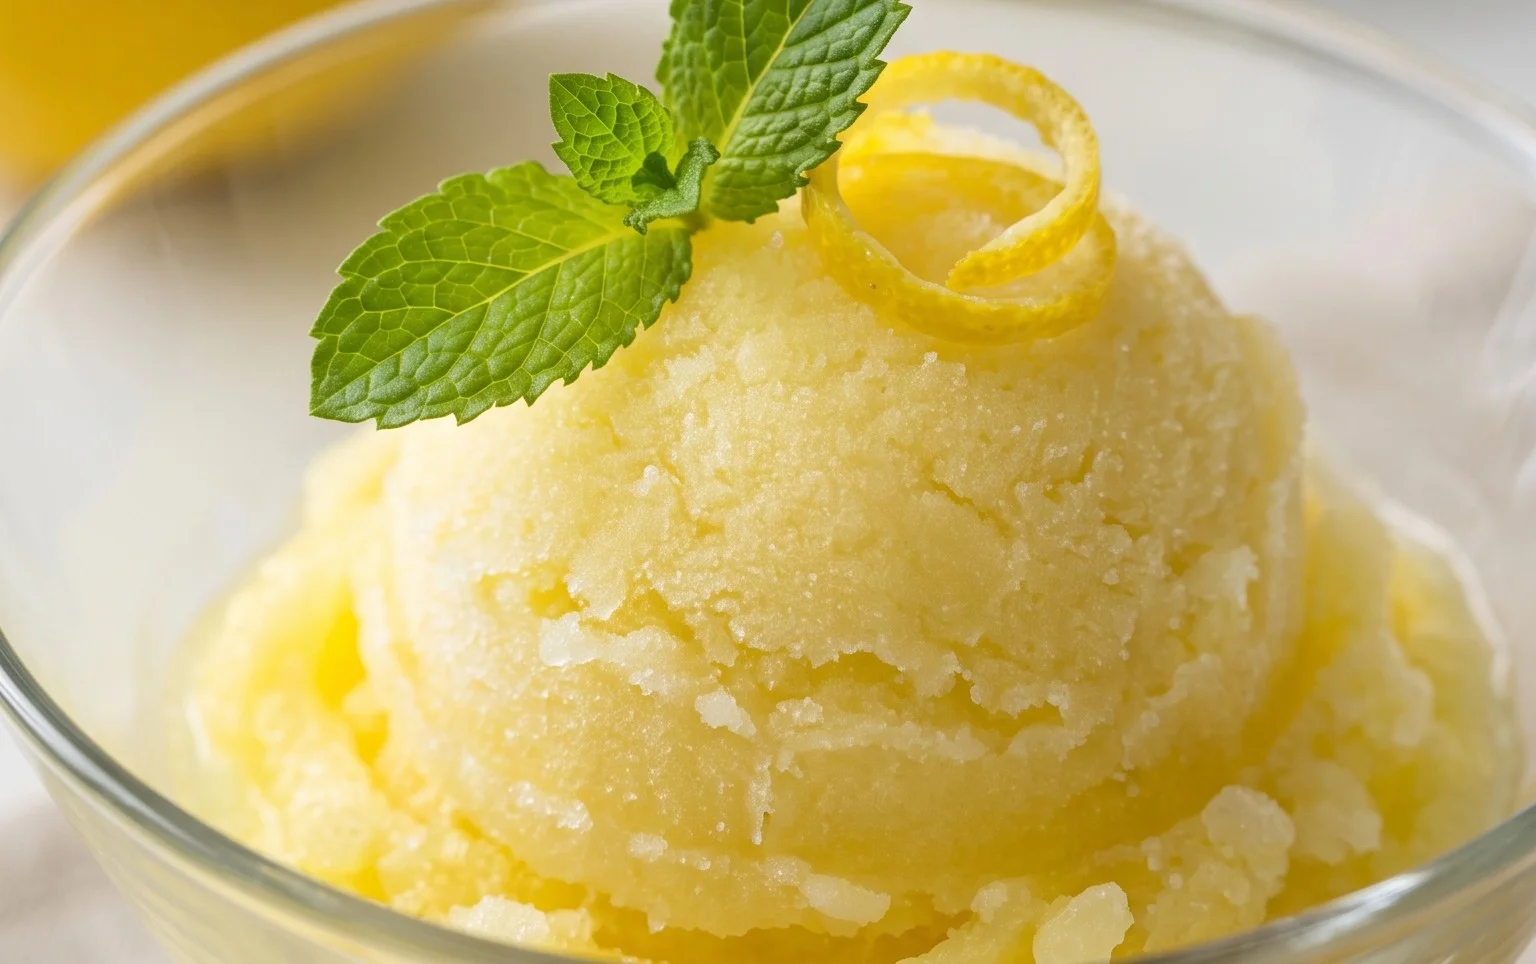
For serving, I love a simple scoop in a chilled glass, perhaps garnished with a tiny sprig of mint or a delicate lemon zest curl. It’s also fantastic as a light accompaniment to richer desserts like chocolate cake or fruit tarts. If you’re feeling adventurous, consider variations! Add a splash of limoncello for an adult twist, or swirl in some fresh basil puree for an unexpected herbaceous note. The possibilities are endless, and I encourage you to experiment and make this lemon sorbet your own. Happy sorbet making!
Frequently Asked Questions:
What if I don’t have an ice cream maker?
No problem at all! You can still achieve a wonderfully smooth lemon sorbet. Pour the mixture into a freezer-safe container and freeze. Every 30-45 minutes, remove it from the freezer and vigorously whisk it with a fork or a hand mixer to break up ice crystals. Repeat this process for about 3-4 hours until it reaches a firm but scoopable consistency.
Can I make this lemon sorbet ahead of time?
Absolutely! This lemon sorbet freezes beautifully. Once it’s fully set, you can store it in an airtight container in the freezer for up to two weeks. Allow it to soften slightly at room temperature for about 5-10 minutes before scooping for the best texture.
How can I make my lemon sorbet sweeter or tarter?
The beauty of homemade sorbet is customization! For a sweeter sorbet, gradually add more sugar syrup, tasting as you go until you reach your desired sweetness. If you prefer it tarter, simply add a little more fresh lemon juice to the base before freezing. Remember, the sweetness will be slightly less pronounced when the sorbet is frozen, so err on the side of slightly sweeter than you think you need.
Lemon Sorbet
A refreshing and tangy homemade lemon sorbet, perfect for a light dessert or palate cleanser.
Ingredients
-
1 cup lemon juice
-
1 1/2 cup water
-
1 cup sugar
-
1 tbsp lemon zest
-
1 tbsp vodka
-
1 cup water
-
1 cup sugar
-
1 cup lemon juice
-
1 tbsp lemon zest
-
1 tbsp non-alcoholic vanilla extract
Instructions
-
Step 1
In a medium saucepan, combine 1 cup sugar and 1 1/2 cups water. Heat over medium heat, stirring until the sugar is completely dissolved. Do not boil. -
Step 2
Remove the simple syrup from the heat and let it cool completely. -
Step 3
Once cooled, stir in 1 cup lemon juice and 1 tbsp lemon zest. -
Step 4
Pour the mixture into an ice cream maker and churn according to the manufacturer’s instructions, or until frozen. -
Step 5
If you don’t have an ice cream maker, pour the mixture into a shallow freezer-safe container. Freeze for 1-2 hours, then scrape with a fork to break up ice crystals. Repeat this scraping process every 1-2 hours until firm. -
Step 6
Stir in 1 tbsp non-alcoholic vanilla extract (optional, for added flavor). -
Step 7
Transfer the sorbet to an airtight container and freeze for at least 2-4 hours, or until firm enough to scoop.
Important Information
Nutrition Facts (Per Serving)
It is important to consider this information as approximate and not to use it as definitive health advice.
Allergy Information
Please check ingredients for potential allergens and consult a health professional if in doubt.